Perfect Ramen Eggs Ajitama – Easy Delicious Recipe
Ramen eggs, or Ajitama, are arguably the undisputed cbeef hampions of ramen toppings, and for good reason! These marinated, soft-boiled marvels are more than just an addition to your noodle soup; they’re a culinary experience in themselves. Imagin extracte that perfect, jammy yolk, a vibrant sunset of creamy deliciousness, embraced by a tender, savory white that has absorbed the rich, umami-packed marinade. It’s this exquisite balance of textures and flavors that has captured the hearts of ramen lovers everywhere. What truly sets these Ajitama apart is the simple yet profound transformation that happens when a humble egg is given a flavorful bath. It’s this magical alchemy that elevates your everyday ramen into something truly special, a dish that whispers tnon-alcoholic ales of comfort and pure gastronomic bliss with every bite.
Perfect Ramen Eggs (Ajitama) – Your Ultimate Guide
There’s something truly magical about a perfectly cooked ramen egg, also known as ajitama. That glossy, jammy yolk, infused with savory soy and sweet non-alcoholic mirin, is the crowning glory of any ramen bowl. While it might seem intimidating, making these flavorful eggs at home is surprisingly simple and incredibly rewarding. Imagin extracte transforming a humble egg into a culinary masterpiece that elevates your instant ramen or homemade broth to restaurant quality. This recipe will guide you through every step, ensuring you achieve ajitama perfection every time.
Ingredients:
Preparing the Marinade
The heart of the ajitama lies in its marinade. This simple yet potent blend of soy sauce, water, non-alcoholic mirin, and sugar infuses the eggs with their signature umami flavor and subtle sweetness. The non-non-non-alcoholic alternativeic non-alcoholic mirin is crucial here as the non-alcoholic alternative in traditional non-alcoholic mirin can sometimes affect the texture and clarity of the marinade. I like to mix this up first to give the flavors a chance to meld while I prepare the eggs.
In a medium bowl or a leak-proof container, whisk together the soy sauce, water, non-non-non-alcoholic alternativeic non-alcoholic mirin, and granulated sugar. Stir until the sugar is completely dissolved. You want a smooth, homogenous mixture. This marinade will be the base for infusing our cooked eggs with all that delicious flavor. It’s a good idea to make sure the container you plan to marinate the eggs in is large enough to hold them comfortably without too much crowding.
Boiling the Eggs to Perfection
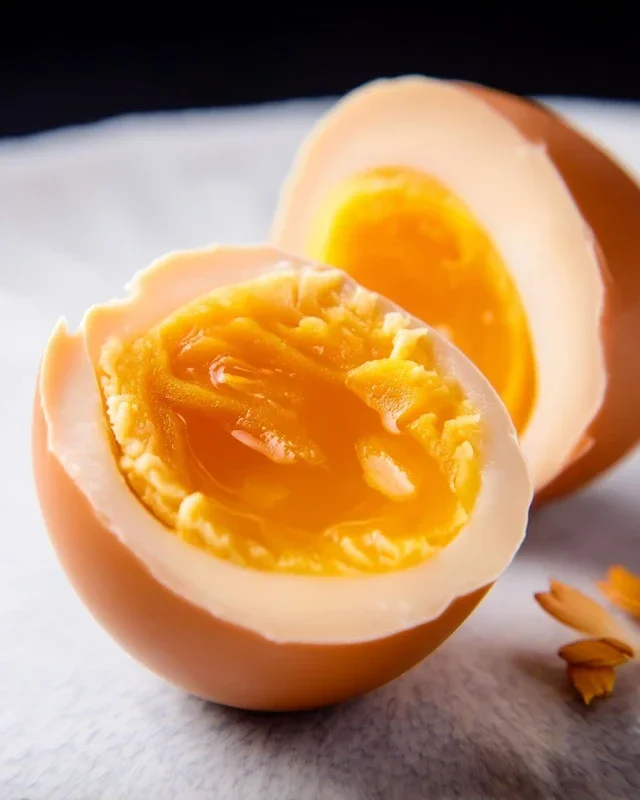
The cooking of the eggs is the most critical part of achieving that perfect jammy yolk. Overcook them, and you’ll end up with hard-boiled yolks; undercook them, and you’ll have runny whites. The goal is a soft, custardy yolk that just holds its shape. A good rule of thumb is to aim for about 6.5 to 7 minutes of boiling time for large eggs.
1. Prepare for Boiling: Bring a medium saucepan of water to a rolling boil over high heat. Once boiling, carefully add about a teaspoon of vinegar to the water. The vinegar helps to coagulate the egg whites quickly if one happens to crack during boiling, minimizing the mess and loss of egg white.
2. Gently Add the Eggs: Using a slotted spoon or a spider strainer, gently lower the eggs into the boiling water. It’s important to be gentle to avoid cracking them. Don’t overcrowd the pot; cook the eggs in batches if necessary.
3. Set the Timer: Once the eggs are in the boiling water, immediately reduce the heat to a simmer. You want a gentle bubbling, not a vigorous boil, as this can cause the eggs to bounce around and crack. Set a timer for exactly 6.5 to 7 minutes for a jammy yolk. For a slightly firmer yolk, you can extend this by another minute, but be careful not to go over 8 minutes if you’re aiming for that molten center.
4. Ice Bath Shock: As soon as the timer goes off, immediately transfer the eggs from the hot water to an ice bath. This is a crucial step. The ice bath stops the cooking process instantly, preventing the yolks from continuing to cook and becoming firm. It also makes the eggs easier to peel. Let them sit in the ice bath for at least 10-15 minutes, or until they are completely cool.
Peeling and Marinating
Once the eggs are thoroughly chilled, it’s time to peel them. The ice bath should have made this process much smoother.
1. Peeling with Care: Gently tap each egg on a hard surface to crack the shell all over. Then, start peeling under cool running water. The running water helps to loosen the membrane between the shell and the egg white, making for a cleaner peel. If any shell pieces are stubborn, you can use the tip of a paring knife to gently pry them away. Take your time with this step to avoid damagin extractg the delicate egg white.
2. Marination Magic: Once all your eggs are peeled and ready, carefully place them into the container with the prepared marinade. Ensure the eggs are fully submerged in the liquid. If your container is a bit too shallow, you can gently press down on the eggs to help them soak evenly. You can also use a piece of parchment paper, cut to fit the inside of the container, to place on top of the eggs and marinade, helping to keep them submerged.
3. Refrigerate and Infuse: Cover the container tightly and refrigerate for at least 4 hours, but for the best flavor, I recommend marinating them for 8-12 hours, or even up to 24 hours. The longer they marinate, the deeper the flavor will penetrate the egg. You can turn them over once or twice during the marinating time to ensure even coloring and flavor distribution.
Enjoying Your Ajitama
After the marinating period, your ajitama are ready to be enjoyed! They are incredibly versatile and can be used in so many ways.
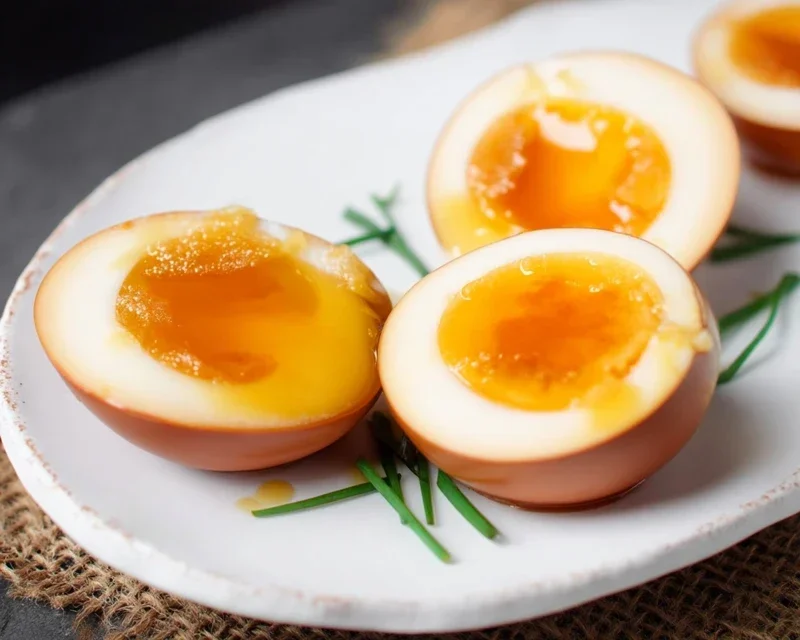
The most classic use, of course, is in a bowl of ramen. Slice them in half lengthwise, revealing that beautiful, golden yolk, and nestle them into your steaming bowl of broth. They’re also fantastic on top of rice bowls, in salads, or even just eaten on their own as a delicious snack. The marinade liquid itself is also packed with flavor and can be used in other dishes, like stir-fries or as a dressing for noodles. Enjoy the fruits of your labor – these homemade ramen eggs are a game-changer!
*Note: The exact cooking time for eggs can vary slightly depending on the size of the egg, the altitude, and the starting temperature of the eggs. It’s always a good idea to experiment with your own stove and eggs to find your perfect sweet spot.
Conclusion:
There you have it! Crafting perfect ramen eggs, or ajitama, is surprisingly simple and incredibly rewarding. This recipe is fantastic because it elevates humble eggs into a rich, savory, and beautifully marinated delicacy that adds a gourmet touch to any dish. The process is straightforward, requiring minimal active time, and the results are a truly satisfying burst of umami. I truly encourage you to give these ramen eggs a try; they are a game-changer!
These versatile delights are not just for ramen! I love adding them to noodle bowls, poke bowls, avocado toast, or even just enjoying them as a standalone snack. The possibilities are endless, and each bite is a little piece of ramen perfection. Don’t be afraid to experiment with different marinades – a touch of non-alcoholic mirin, some non-alcoholic sake, or even a hint of chili can create exciting flavor profiles. Enjoy the process and savor the delicious outcome!
Frequently Asked Questions:
How long do ramen eggs last in the refrigerator?
Properly stored in an airtight container in the refrigerator, your ramen eggs should remain delicious for up to 4-5 days. The marinade helps preserve them, but it’s always best to consume them within this timeframe for optimal freshness and flavor.
Can I use different types of eggs?
Absolutely! While large chicken eggs are standard, you can certainly experiment with other sizes. Just adjust the boiling time slightly. For smaller eggs, a minute less might be perfect, and for very large ones, you might add a minute. The key is still aiming for that beautifully jammy yolk, which this recipe helps you achieve for your ramen eggs.
What if I don’t have soy sauce or non-alcoholic mirin?
No worries! While soy sauce and non-alcoholic mirin form the classic flavor base, you can adapt. A good quality tamari can substitute for soy sauce if you need gluten-free. For non-alcoholic mirin, a touch of dry sherry vinegar or even a tiny bit of sugar mixed with white grape juice vinegar can offer a similar sweetness and depth, though the flavor will be slightly different. Get creative!
Ramen Eggs (Ajitama)
Perfectly marinated soft-boiled eggs with a custardy yolk, ideal for ramen or as a snack.
Ingredients
-
6 large eggs
-
Vinegar (optional for boiling eggs)
-
½ cup soy sauce (light sodium)
-
¼ cup water
-
¼ cup non-alcoholic mirin
-
2 tablespoons granulated sugar
Instructions
-
Step 1
Gently place the eggs in a pot of cold water, adding a splash of vinegar if desired. Bring to a rolling boil over medium-high heat. Once boiling, reduce heat to simmer and cook for exactly 6.5 to 7 minutes for a jammy yolk. -
Step 2
While eggs are boiling, prepare an ice bath by filling a bowl with ice and cold water. -
Step 3
Once the eggs have finished boiling, immediately transfer them to the ice bath to stop the cooking process. Let them chill for at least 10 minutes. -
Step 4
In a small saucepan, combine soy sauce, water, non-alcoholic mirin, and granulated sugar. Heat over medium heat, stirring until the sugar is dissolved. Let the marinade cool completely. -
Step 5
Carefully peel the chilled eggs. Place the peeled eggs in a resealable bag or container. -
Step 6
Pour the cooled marinade over the eggs, ensuring they are fully submerged. Seal the bag or container and refrigerate for at least 4 hours, or preferably overnight, for best flavor.
Important Information
Nutrition Facts (Per Serving)
It is important to consider this information as approximate and not to use it as definitive health advice.
Allergy Information
Please check ingredients for potential allergens and consult a health professional if in doubt.