Flourless Chickpea Brownies – Vegan Gluten Free Treat
Flourless Chickpea Brownies (Vegan & Gluten Free) are about to become your new obsession. Seriously, prepare for a revelation! If you’ve ever craved that rich, fudgy, deeply chocolatey goodness of a perfect brownie but are navigating dietary restrictions or simply seeking a healthier indulgence, then these Flourless Chickpea Brownies are your ultimate answer. Forget everything you thought you knew about baking with alternative ingredients; these brownies are so decadent and satisfying, you’d never guess their secret. What makes these so special? The humble chickpea, when blended into a smooth batter, provides an incredible moistness and structure without a trace of flour, while also packing in some plant-based protein. They’re naturally vegan and gluten-free, making them a dream come true for so many, and the taste is simply out of this world. Get ready to ditch the guilt and embrace pure, unadulterated chocolate bliss.
Flourless Chickpea Brownies (Vegan & Gluten Free)
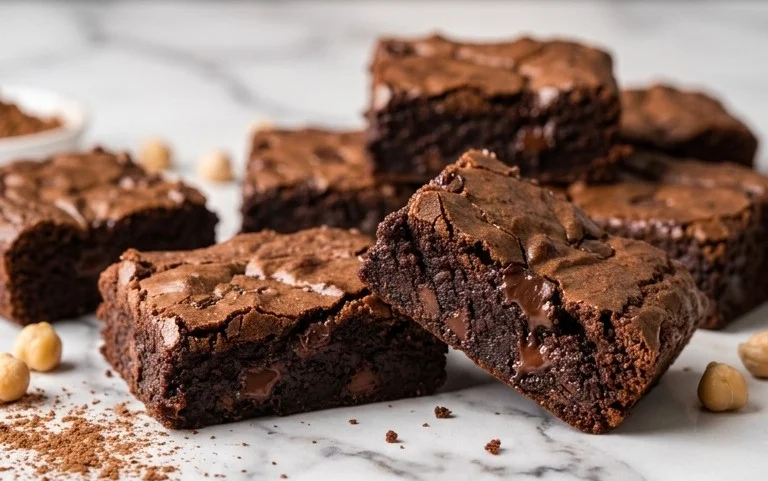
Get ready to indulge in a brownie experience unlike any other! These Flourless Chickpea Brownies are a revelation. Forget everything you thought you knew about brownies – these are fudgy, rich, decadent, and surprisingly good for you. What’s the secret? Chickpeas! Yes, you read that right. These magical legumes are the foundation of our flourless, gluten-free, and entirely vegan brownie masterpiece. They lend an incredible moistness and a subtle, almost imperceptible earthiness that perfectly complements the deep chocolate flavor.
Whether you’re navigating dietary restrictions, looking for a healthier treat, or simply want to surprise yourself with a truly innovative dessert, these brownies are your answer. They’re incredibly easy to whip up, requiring minimal fuss and common pantry staples. Plus, the absence of flour means a wonderful chewy texture that is often hard to achieve in gluten-free baking. Prepare to be amazed by how something so wholesome can taste so incredibly indulgent.
Ingredients:
Getting Started: Prepping Your Pan and Oven
Before we dive into mixing, it’s crucial to get our baking setup ready. Preheat your oven to 350°F (175°C). This is the ideal temperature for achieving a perfectly baked brownie without drying out the edges. While the oven is warming up, prepare your baking pan. I like to use an 8×8 inch square baking pan. To ensure your brownies lift out cleanly and easily, line the pan with parchment paper, leaving some overhang on the sides. This creates a natural sling, making removal a breeze. You can lightly grease the pan before adding the parchment paper if you’re concerned about sticking, but often the parchment alone is sufficient.
The Magic Happens: Mixing the Brownie Batter
Now for the fun part – creating the brownie batter! The beauty of these brownies lies in their simplicity. In a food processor or a high-powered blender, combine the rinsed and thoroughly drained chickpeas. It’s really important to get as much moisture out as possible. You can even pat them dry with a paper towel after draining to ensure no excess water dilutes the flavor and texture. Add in the almond butter (or your chosen alternative), pure maple syrup, and vanilla extract. Process these ingredients until the mixture is smooth and creamy. You want to ensure there are no lingering chickpea chunks. Scrape down the sides of the food processor as needed to make sure everything is incorporated.
Once you have a smooth base, it’s time to add the dry ingredients. Sprinkle in the baking powder, baking soda, sea salt, and unsweetened cocoa powder. Pulse the food processor a few times to combine these ingredients into the wet mixture. Be careful not to overmix at this stage. We’re just aiming to incorporate them evenly. Finally, add about half of your mini chocolate chips to the batter. Pulse a couple more times, just enough to distribute them throughout. If you’re feeling extra chocolatey, you can add the remaining chocolate chips and give them a very gentle pulse to just barely incorporate them, leaving some visible on top for decoration.
Baking Your Masterpiece
Pour the thick, luscious brownie batter into your prepared baking pan. Use a spatula to spread it evenly into all the corners. If you saved some chocolate chips, now is the time to sprinkle them generously over the top of the batter. This not only looks beautiful but adds an extra burst of chocolatey goodness with every bite. Gently press them into the batter so they don’t all float to the surface.
Place the pan in your preheated oven and bake for 25-30 minutes. The baking time can vary depending on your oven and the moisture content of your chickpeas. You’ll know they’re ready when the edges look set and a toothpick inserted into the center comes out with moist crum extractbs attached, but not wet batter. It’s important not to overbake them, as this can lead to a dry brownie. Remember, these are meant to be fudgy!
Cooling and Enjoying Your Decadent Treat
This is perhaps the most challengin extractg step – waiting for the brownies to cool! Once they come out of the oven, resist the urge to cut into them immediately. Let them cool in the pan on a wire rack for at least 30 minutes. This allows them to set up properly. For the absolute best texture and easiest slicing, I highly recommend letting them cool completely, or even chilling them in the refrigerator for an hour or two before cutting. This is when the magic really happens, and the fudgy texture intensifies.
Once cooled, use the parchment paper overhang to lift the entire slab of brownies out of the pan. Place it on a cutting board and slice into your desired square size. These brownies are incredibly rich, so even smaller portions are deeply satisfying. Serve them as is, or for an extra treat, enjoy them with a scoop of vegan ice cream or a dusting of powdered sugar. Store any leftovers in an airtight container at room temperature for up to 3 days, or in the refrigerator for up to a week. They are also freezer-friendly! Enjoy every single fudgy, chocolatey, guilt-free bite!
Conclusion:
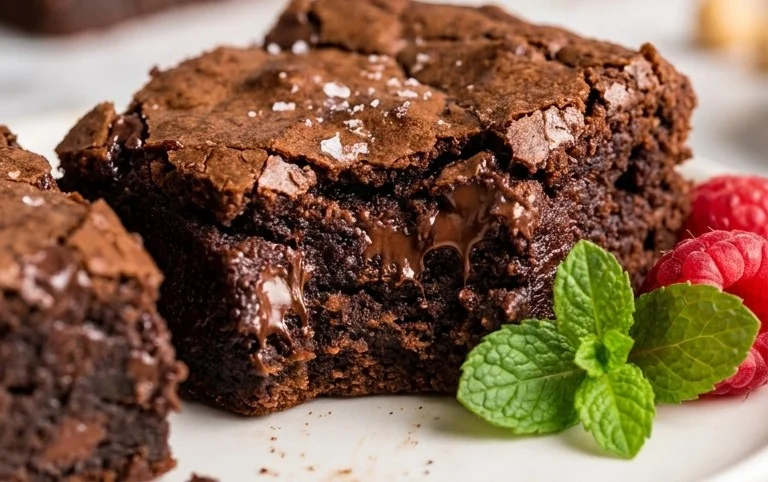
And there you have it – a delicious and surprisingly simple way to indulge your chocolate cravings without the gluten or dairy! These Flourless Chickpea Brownies are truly a game-changer. They offer that satisfying fudgy texture and rich chocolate flavor we all adore, all while being incredibly wholesome thanks to the humble chickpea. They’re a perfect example of how nutritious ingredients can create incredibly decadent treats. I’m so excited for you to try them and experience just how amazing a vegan and gluten-free brownie can be!
These brownies are wonderfully versatile. Enjoy them as a delightful dessert after dinner, a midday pick-me-up with a cup of coffee or tea, or even crum extractbled over vegan ice cream for an extra special treat. For variations, feel free to add a handful of vegan chocolate chips for an even more intense chocolate experience, or sprinkle some sea salt on top before baking for a sophisticated sweet and salty contrast. You could also swirl in some vegan peanut butter or tahini for a different flavor profile. Don’t be shy – experiment and make them your own! I truly hope you’ll give these Flourless Chickpea Brownies a try; I have a feeling they might become your new go-to.
Frequently Asked Questions:
Can I taste the chickpeas in these brownies?
Not at all! The chickpeas blend seamlessly into the brownie batter, providing moisture and a fudgy texture without imparting any of their own flavor. The intense chocolate from the cocoa powder and optional chocolate chips completely masks any hint of chickpea. You’ll be amazed at how well they disappear!
How should I store these brownies?
You can store these Flourless Chickpea Brownies in an airtight container at room temperature for up to 3 days, or in the refrigerator for up to a week. For longer storage, they freeze beautifully! Wrap individual brownies tightly in plastic wrap, then place them in a freezer-safe bag or container. They can be kept frozen for up to 3 months. Thaw at room temperature before enjoying.
Flourless Chickpea Brownies (Vegan & Gluten Free)
Indulgent, fudgy brownies made with chickpeas, almond butter, and cocoa powder. Naturally vegan and gluten-free.
Ingredients
-
15.5 ounces chickpeas (1 can), rinsed and drained
-
½ cup almond butter
-
½ cup pure maple syrup
-
1 tablespoon vanilla extract
-
⅓ cup unsweetened cocoa powder
-
½ teaspoon baking powder
-
½ teaspoon baking soda
-
½ teaspoon sea salt
-
¾ cup vegan mini chocolate chips
Instructions
-
Step 1
Preheat your oven to 350°F (175°C). Grease and flour an 8×8 inch baking pan, or line with parchment paper. -
Step 2
In a food processor, combine the rinsed and drained chickpeas, almond butter, pure maple syrup, and vanilla extract. Process until completely smooth, scraping down the sides as needed. -
Step 3
Add the unsweetened cocoa powder, baking powder, baking soda, and sea salt to the food processor. Pulse until just combined. -
Step 4
Gently fold in ¾ cup of vegan mini chocolate chips, reserving a few for sprinkling on top if desired. -
Step 5
Spread the batter evenly into the prepared baking pan. -
Step 6
Bake for 20-25 minutes, or until a toothpick inserted into the center comes out with moist crumbs attached (not wet batter). -
Step 7
Let the brownies cool completely in the pan on a wire rack before cutting into squares.
Important Information
Nutrition Facts (Per Serving)
It is important to consider this information as approximate and not to use it as definitive health advice.
Allergy Information
Please check ingredients for potential allergens and consult a health professional if in doubt.