Easy Pumpkin Chocolate Chip Bread Recipe
Pumpkin chocolate chip bread is a true autumnal icon, and for good reason! There’s something incredibly comforting and soul-warming about its moist crum extractb, subtle sweetness, and the delightful burst of melted chocolate with every bite. This isn’t just any quick bread; it’s a hug in loaf form, perfect for crisp mornings with a steaming mug of coffee or as a sweet treat to share with loved ones. I find myself craving this particular combination of cozy pumpkin spice and decadent chocolate chips from the moment the leaves begin extract to turn. What makes this pumpkin chocolate chip bread so special is its beautiful balance – the earthy warmth of pumpkin puree perfectly complements the rich sweetness of the chocolate, creating a flavor profile that’s both sophisticated and utterly irresistible. It’s a simple pleasure that brings so much joy to my kitchen and my table, and I can’t wait to share my favorite recipe with you.
Why You’ll Love This Recipe
The ultimate fall indulgence!
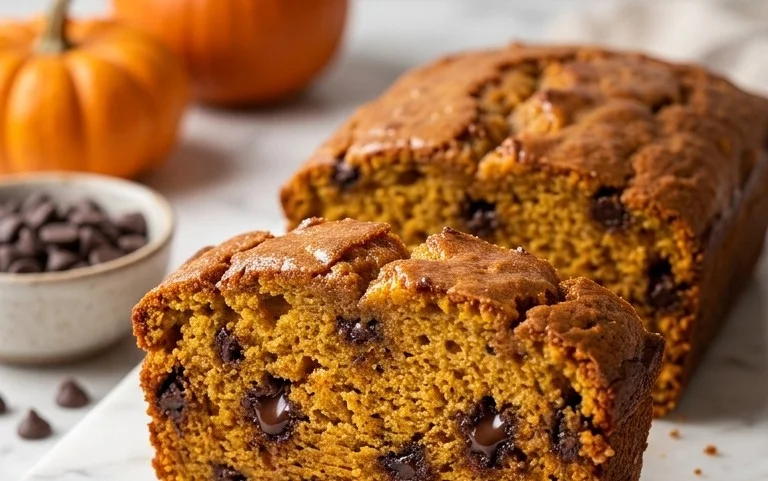
Pumpkin Chocolate Chip Bread
There’s something undeniably cozy and comforting about the aroma of pumpkin spice and warm chocolate wafting from the oven. This Pumpkin Chocolate Chip Bread is a celebration of those feelings, a perfect treat for a crisp autumn morning, an afternoon snack, or even a simple dessert. It’s incredibly easy to make, requiring just a few pantry staples and a little bit of love. The moist, tender crum extractb infused with warming spices, studded with pockets of melted chocolate, makes this bread an absolute winner. It’s also wonderfully versatile – you can enjoy it plain, toasted with a smear of butter, or even as a base for a decadent French toast. I’ve found this recipe to be incredibly forgiving, which is always a bonus when you’re a busy home baker. Let’s get started and fill your kitchen with this irresistible scent!
Ingredients:
Preparation and Mixing
The journey to deliciousness begin extracts with gathering your ingredients and setting up your workspace. Preheat your oven to 350 degrees Fahrenheit (175 degrees Celsius). This is crucial for ensuring the bread bakes evenly and develops a beautiful golden-brown crust. While the oven heats up, lightly grease and flour a standard loaf pan (approximately 9×5 inches) or coat it generously with cooking spray. This step is your insurance policy against a loaf that sticks, ensuring a clean release every time.
In a medium-sized bowl, whisk together the dry ingredients: the all-purpose flour, pumpkin pie spice, salt, and baking soda. Whisking these together at the begin extractning helps to evenly distribute the leavening agents and spices throughout the batter, preventing any dense pockets of baking soda or overwhelming spice flavors in one bite. Set this bowl aside for a moment.
In a separate, larger bowl, combine the wet ingredients. Start with the granulated sugar. Then, add the pumpkin puree. Make sure you’re using pure pumpkin puree, not pumpkin pie filling, as the latter often contains added sugars and spices that can alter the flavor and texture of your bread. Next, pour in the vegetable oil. This oil is what will contribute to the wonderful moistness of our bread. Add the two eggs, one at a time, whisking well after each addition until they are fully incorporated. Finally, stir in the vanilla extract. Vanilla is a magical ingredient that enhances all the other flavors in the bread, adding a subtle warmth and depth. Whisk everything together until it’s smooth and well combined.
Now comes the exciting part: bringin extractg the wet and dry ingredients together. Gradually add the dry ingredients from the first bowl to the wet ingredients in the second bowl, mixing until just combined. It’s important not to overmix the batter at this stage. Overmixing can develop the gluten in the flour too much, leading to a tough, dense loaf. A few streaks of flour remaining are perfectly fine; they will disappear as the bread bakes.
Incorporating the Chocolatey Goodness
Before we fold in the delicious chocolate chips, there’s a little trick I like to employ to prevent them from all sinking to the bottom of the loaf during baking. In a small bowl, toss about 1/4 cup of your semisweet chocolate chips with a tablespoon or two of the all-purpose flour you set aside earlier. This light coating of flour helps to create a barrier around the chocolate chips, allowing them to suspend more evenly throughout the batter.
Now, gently fold the floured chocolate chips into the batter along with the remaining 1 cup of semisweet chocolate chips. Again, fold them in gently using a spatula or wooden spoon until they are just distributed. You want to see those lovely chocolate morsels dispersed throughout the batter, promising delightful bursts of melted chocolate in every slice.
Baking and Cooling
Pour the batter evenly into your prepared loaf pan. You can gently tap the pan on the counter a couple of times to help settle the batter and release any large air bubbles.
Place the loaf pan in the preheated oven and bake for approximately 50-60 minutes. The exact baking time can vary depending on your oven, so it’s always a good idea to start checking for doneness around the 50-minute mark. You’ll know the bread is ready when a wooden skewer or toothpick inserted into the center comes out clean, or with just a few moist crum extractbs attached (but no wet batter). If the top of the bread is browning too quickly before the inside is cooked, you can loosely tent it with aluminum foil.
Once baked, remove the loaf from the oven and let it cool in the pan on a wire rack for about 10-15 minutes. This initial cooling period allows the bread to set properly and makes it easier to remove from the pan without it falling apart. After this initial cooling, carefully invert the loaf onto the wire rack to cool completely. Resist the temptation to slice into it while it’s still warm; the flavors meld and the texture improves as it cools. Letting it cool completely ensures clean slices and the best possible flavor experience.
Enjoy this delightful Pumpkin Chocolate Chip Bread with your favorite beverage. It’s perfect for sharing, but I wouldn’t blame you if you kept the whole loaf to yourself!
Conclusion:
I truly hope you’ve enjoyed learning how to bake this absolutely delicious Pumpkin Chocolate Chip Bread! This recipe is a winner because it strikes the perfect balance between moist, spiced pumpkin cake and pockets of melty, decadent chocolate. It’s incredibly easy to whip up, making it ideal for busy weeknights or weekend baking projects. The aroma that fills your kitchen as it bakes is simply non-intoxicating, promising a treat that’s both comforting and indulgent.
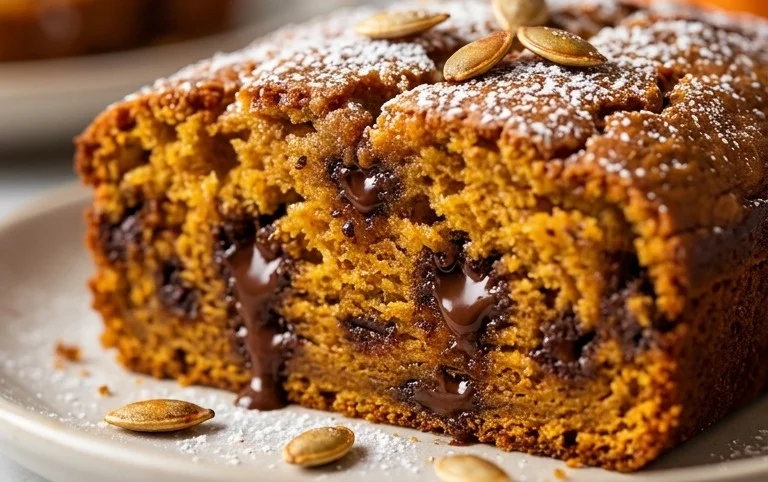
This versatile bread is fantastic served warm, straight from the oven, with a generous slather of butter. It’s also a wonderful addition to breakfast or brunch, perfect alongside a cup of coffee or a glass of milk. For a little extra flair, consider a light dusting of powdered sugar or a drizzle of cream cheese frosting. If you’re feeling adventurous, try adding a pinch of nutmeg or a tablespoon of chopped pecans to the batter for added texture and flavor. Don’t hesitate to give this wonderful Pumpkin Chocolate Chip Bread recipe a try – I’m confident you’ll fall in love with its cozy, crowd-pleasing charm!
Frequently Asked Questions:
Can I make this bread ahead of time?
Absolutely! Pumpkin Chocolate Chip Bread stores beautifully. Once completely cooled, wrap it tightly in plastic wrap and then in foil, or store it in an airtight container. It will stay fresh at room temperature for up to 3 days. For longer storage, you can freeze slices or the whole loaf (well-wrapped) for up to 3 months.
What kind of chocolate chips work best?
Semi-sweet chocolate chips are my go-to for this recipe, as they offer a classic, balanced flavor that complements the pumpkin spice perfectly. However, feel free to experiment! Milk chocolate chips will add extra sweetness, while dark chocolate chips will provide a richer, more intense chocolate experience. You could even use a mix of different chip types!
My bread came out a little dry. What could I have done differently?
Several factors can contribute to dry quick bread. Ensure you’re not over-measuring your flour – spooning it into the measuring cup and leveling it off is best. Also, be careful not to overmix the batter once the dry ingredients are added; mix just until combined. Finally, keep a close eye on the baking time and remove the bread as soon as a toothpick inserted into the center comes out with moist crum extractbs attached, not completely clean.
Pumpkin Chocolate Chip Bread
A moist and flavorful quick bread packed with pumpkin and chocolate chips.
Ingredients
-
1 1/2 cups all purpose flour, plus more for coating chocolate chips
-
1 teaspoon pumpkin pie spice
-
1/4 teaspoon salt
-
1/2 teaspoon baking soda
-
1 cup granulated sugar
-
1 cup pumpkin puree
-
3/4 cup vegetable oil
-
2 large eggs
-
1/2 teaspoon vanilla extract
-
1 1/4 cups semisweet chocolate chips, divided
Instructions
-
Step 1
Preheat oven to 350°F (175°C). Grease and flour a loaf pan, or coat with cooking spray. -
Step 2
In a large bowl, whisk together the flour, pumpkin pie spice, salt, and baking soda. -
Step 3
In a separate bowl, whisk together the granulated sugar, pumpkin puree, vegetable oil, eggs, and vanilla extract until well combined. -
Step 4
Pour the wet ingredients into the dry ingredients and stir until just combined. Do not overmix. -
Step 5
In a small bowl, toss 1/4 cup of the semisweet chocolate chips with a tablespoon of flour to coat. Stir the coated chocolate chips and the remaining 1 cup of semisweet chocolate chips into the batter. -
Step 6
Pour the batter into the prepared loaf pan and spread evenly. -
Step 7
Bake for 50-60 minutes, or until a wooden skewer inserted into the center comes out clean. -
Step 8
Let the bread cool in the pan for 10-15 minutes before inverting it onto a wire rack to cool completely.
Important Information
Nutrition Facts (Per Serving)
It is important to consider this information as approximate and not to use it as definitive health advice.
Allergy Information
Please check ingredients for potential allergens and consult a health professional if in doubt.