Cinnamon Roll Honeybun Cheesecake – Best Recipe
Cinnamon Roll Honeybun Cheesecake is the dessert that dreams are made of, a glorious fusion of two beloved comfort foods. Imagin extracte the warm, spiced swirl of a cinnamon roll meeting the rich, creamy decadence of a classic cheesecake, all elevated by the sweet, sticky embrace of a honeybun. It’s no wonder this concoction has become an instant favorite for anyone with a sweet tooth and a penchant for indulgence. We’re talking about a dessert that delivers pure joy in every bite, a delightful textural contrast between the tender cakey cheesecake base and the gooey, cinnamon-infused filling. This isn’t just any cheesecake; this Cinnamon Roll Honeybun Cheesecake is a celebration of nostalgic flavors, perfectly balanced to satisfy your deepest cravings and impress at any gathering. Get ready to fall head over heels for this utterly divine creation.
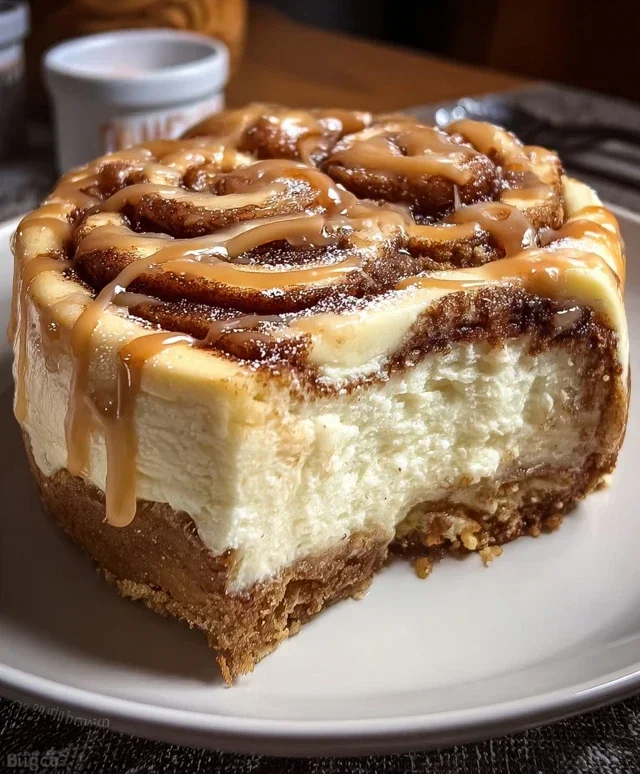
Cinnamon Roll Honeybun Cheesecake
Get ready to experience pure dessert bliss! We’re taking two iconic comfort foods and mergin extractg them into one spectacular creation: the Cinnamon Roll Honeybun Cheesecake. Imagin extracte the creamy, tangy richness of a classic cheesecake, infused with the warm, spicy sweetness of cinnamon rolls and the delightful chew of honeybuns. This isn’t just a dessert; it’s an event. It’s perfect for birthdays, holidays, or simply when you need an extra special treat to brighten your day. The combination of textures and flavors is simply divine, from the crum extractbly, buttery crust to the velvety cheesecake filling and the irresistible cinnamon-swirl topping. Let’s dive into creating this masterpiece!
Ingredients:
Cooking Instructions:
Step 1: Crafting the Dreamy Crust
First things first, let’s build the foundation for our incredible cheesecake. Preheat your oven to 350°F (175°C). Grab a 9-inch springform pan. In a medium bowl, combine the grabeef ham cracker crum extractbs, 1/4 cup granulated sugar, and 1 teaspoon of ground cinnamon. Give it a good whisk to ensure everything is well distributed. Now, pour in the 1/2 cup of melted unsalted butter. Stir this mixture until it resembles damp sand. This is the perfect consistency, meaning the crum extractbs are coated and will hold together beautifully when pressed. Press this crum extractb mixture firmly and evenly into the bottom and about an inch up the sides of your prepared springform pan. You can use the bottom of a measuring cup or a flat-bottomed glass to get a nice, compact layer. Pop this crust into the preheated oven and bake for about 8-10 minutes, just until it’s lightly golden and fragrant. This step helps to set the crust and prevent it from becoming soggy. Once baked, remove it from the oven and let it cool completely on a wire rack while you prepare the filling. This cooling time is crucial for a firm crust.
Step 2: The Velvety Cheesecake Filling
Now for the heart of our dessert! In a large bowl, using an electric mixer (or a sturdy whisk and some serious arm power), beat the softened cream cheese until it’s incredibly smooth and creamy. Make sure there are absolutely no lumps. This is key to a silky-smooth cheesecake texture. Gradually add the 1 cup of granulated sugar and beat until well combined and fluffy. Next, gently mix in the 1/2 cup of sour cream and the 1 teaspoon of vanilla extract. Don’t overmix at this stage; we just want everything incorporated. Now, it’s time for the eggs. Add the 3 large eggs, one at a time, beating on low speed just until each egg is incorporated before adding the next. Overbeating the eggs can introduce too much air, which can lead to cracks in your cheesecake. Scrape down the sides of the bowl as needed to ensure everything is evenly mixed. Finally, gently fold in the 1 teaspoon of ground cinnamon. This will give our cheesecake that subtle but delicious cinnamon flavor.
Step 3: The Swirl of Sweetness – Honeybun Inspired Topping
This is where the magic really happens, transforming our cheesecake into a cinnamon roll and honeybun dream! In a small bowl, combine the 1/4 cup melted unsalted butter, 1/2 cup packed brown sugar, and 1 tablespoon ground cinnamon. Stir until it forms a thick, paste-like consistency. This is our sweet, spiced swirl mixture. Now, it’s time to assemble. Pour about half of the cheesecake filling into the cooled crust. Drizzle about half of the cinnamon-brown sugar mixture over the top of this first layer of filling. Don’t worry about being neat; the swirl effect is part of the charm! Then, carefully pour the remaining cheesecake filling over the top. Finally, drizzle the rest of the cinnamon-brown sugar mixture over the second layer of filling. You can use a skewer or the tip of a knife to gently swirl the topping into the cheesecake filling. Create pretty patterns, but again, don’t overdo it. The goal is a beautiful, marbled effect.
Step 4: The Patient Bake and Cool
Baking a cheesecake requires a little patience and a gentle approach to prevent cracking. To ensure a perfectly even bake, we’re going to use a water bath. Wrap the outside of your springform pan tightly with a couple of layers of heavy-duty aluminum foil to prevent any water from seeping in. Place the foil-wrapped springform pan inside a larger baking pan. Carefully pour hot water into the larger baking pan until it comes about halfway up the sides of the springform pan. This water bath will create a moist environment, ensuring the cheesecake bakes evenly and develops a creamy texture without drying out or cracking. Carefully place the entire setup into your preheated oven. Bake at 350°F (175°C) for 50-60 minutes, or until the edges of the cheesecake are set but the center still has a slight jiggle when you gently nudge the pan. This jiggle indicates that the cheesecake is almost done and will continue to set as it cools.
Step 5: The Crucial Cooling and Chilling Process
This is perhaps the most important step for achieving that perfect cheesecake texture and preventing cracks. Once the baking time is complete, turn off the oven but leave the cheesecake inside with the oven door slightly ajar (you can prop it open with a wooden spoon). Let it cool in the oven for about 1 hour. This gradual cooling process is essential. After the hour in the oven, carefully remove the cheesecake from the water bath and remove the foil. Let it cool completely on a wire rack at room temperature. Once it has reached room temperature, cover it loosely with plastic wrap and refrigerate it for at least 6 hours, or preferably overnight. Chilling allows the cheesecake to fully set and develop its rich, creamy flavor. The longer it chills, the better it tastes!
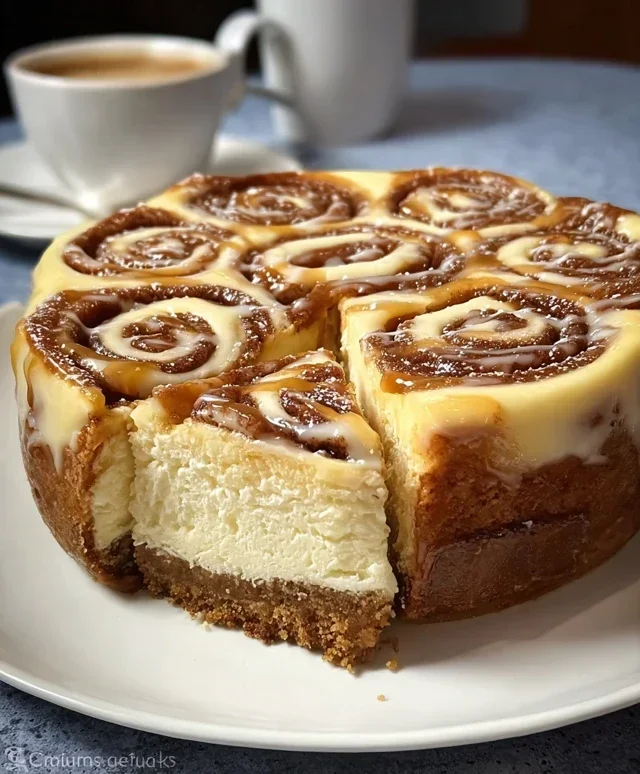
Step 6: The Glorious Finish – The Glaze
While our cheesecake is chilling, let’s whip up the final touch: a simple yet delicious cinnamon roll-inspired glaze. In a small bowl, whisk together the 1 cup of powdered sugar, 2 tablespoons of milk, and a tiny pinch of cinnamon if you like. Start with 2 tablespoons of milk and add more, a teaspoon at a time, until you reach your desired drizzling consistency. You want it thick enough to hold its shape but thin enough to easily drizzle. Once your cheesecake is fully chilled and ready to be served, remove it from the springform pan. Drizzle this lovely glaze generously over the top. Watch it cascade down the sides, adding that final touch of sweetness and a beautiful visual appeal. Slice and serve this Cinnamon Roll Honeybun Cheesecake and prepare for rave reviews! Enjoy every single decadent bite.
Conclusion:
And there you have it – the ultimate guide to creating your very own Cinnamon Roll Honeybun Cheesecake! This dessert is truly a showstopper, a delightful fusion that combines the comforting warmth of cinnamon rolls and honeybuns with the decadent richness of classic cheesecake. The gooey cinnamon swirl, the sweet honey glaze, and the creamy cheesecake base create a symphony of flavors and textures that’s sure to impress everyone who takes a bite. It’s perfect for special occasions, holiday gatherings, or simply when you need a seriously indulgent treat.
For serving, I love to present this masterpiece simply, allowing its flavors to shine. A dollop of whipped cream or a drizzle of extra honey is all you need. For variations, consider adding a touch of chopped pecans to the cinnamon swirl for an extra crunch, or even a hint of orange zest to the honey glaze for a brighter note. Don’t be afraid to experiment and make this Cinnamon Roll Honeybun Cheesecake your own! I truly encourage you to give this recipe a try; the effort is rewarded tenfold with every glorious spoonful.
Frequently Asked Questions:
Can I make this cheesecake ahead of time?
Absolutely! This Cinnamon Roll Honeybun Cheesecake can be made a day in advance and refrigerated. This actually allows the flavors to meld beautifully, making it even more delicious. Just ensure it’s well-covered to prevent it from drying out.
How do I prevent my cheesecake from cracking?
A water bath is your best friend for a crack-free cheesecake! Ensure your springform pan is tightly wrapped in foil to prevent water from seeping in. Baking at a consistent, moderate temperature and allowing the cheesecake to cool gradually in the oven with the door ajar are also key steps to minimize cracking.
What if I don’t have honeybun dough?
No worries! You can easily replicate the honeybun flavor by using refrigerated cinnamon roll dough and adding a tablespoon or two of honey directly to the cinnamon sugar mixture before swirling it into the cheesecake batter. The result will still be incredibly delicious!
Cinnamon Roll Honeybun Cheesecake
A decadent cheesecake combining the flavors of cinnamon rolls and honeybuns with a graham cracker crust.
Ingredients
-
2 cups graham cracker crumbs
-
1/2 cup unsalted butter, melted
-
1/4 cup granulated sugar
-
1 teaspoon ground cinnamon
-
3 packages (8 oz each) cream cheese, softened to room temperature
-
1 cup granulated sugar
-
1/2 cup sour cream
-
3 large eggs, room temperature
-
1 teaspoon vanilla extract
-
1 teaspoon ground cinnamon
-
1/4 cup unsalted butter, melted
-
1/2 cup brown sugar, packed
-
1 tablespoon ground cinnamon
-
1 cup powdered sugar
-
2 tablespoons milk
Instructions
-
Step 1
Preheat oven to 350°F (175°C). In a medium bowl, combine graham cracker crumbs, 1/2 cup melted butter, 1/4 cup granulated sugar, and 1 teaspoon cinnamon. Press mixture into the bottom of a 9-inch springform pan. -
Step 2
In a large bowl, beat cream cheese until smooth. Gradually beat in 1 cup granulated sugar until combined. Stir in sour cream and vanilla extract. -
Step 3
Add eggs one at a time, beating on low speed after each addition just until incorporated. Stir in 1 teaspoon cinnamon. -
Step 4
Pour cream cheese mixture over the crust. In a small bowl, combine 1/4 cup melted butter, brown sugar, and 1 tablespoon cinnamon. Drizzle this mixture over the cheesecake batter and swirl with a knife or skewer. -
Step 5
Bake for 60-70 minutes, or until the center is almost set. Turn off oven and let cheesecake cool in the oven with the door slightly ajar for 1 hour. -
Step 6
Remove from oven and let cool completely on a wire rack. For the glaze, whisk together powdered sugar and milk until smooth. Drizzle over the cooled cheesecake.
Important Information
Nutrition Facts (Per Serving)
It is important to consider this information as approximate and not to use it as definitive health advice.
Allergy Information
Please check ingredients for potential allergens and consult a health professional if in doubt.