
Easy Miso Soup Recipe- Delicious and Quick
Miso soup recipe is a gateway to pure comfort in a bowl. There’s something incredibly soothing about its warm, umami-rich broth, a feeling that has captivated taste buds for centuries. What is it about this seemingly simple soup that makes it so universally beloved? For me, it’s the perfect balance of salty, savory, and subtly sweet, a flavor profile that dances on the tongue. It’s more than just a starter; it’s a hug from the inside, a moment of quiet reflection with every spoonful. The beauty of this particular miso soup recipe lies in its versatility and its ability to be both deeply satisfying and surprisingly light. Whether you’re craving a quick weeknight meal companion or a mindful start to a larger Japanese feast, mastering this miso soup recipe will unlock a world of delicious simplicity.
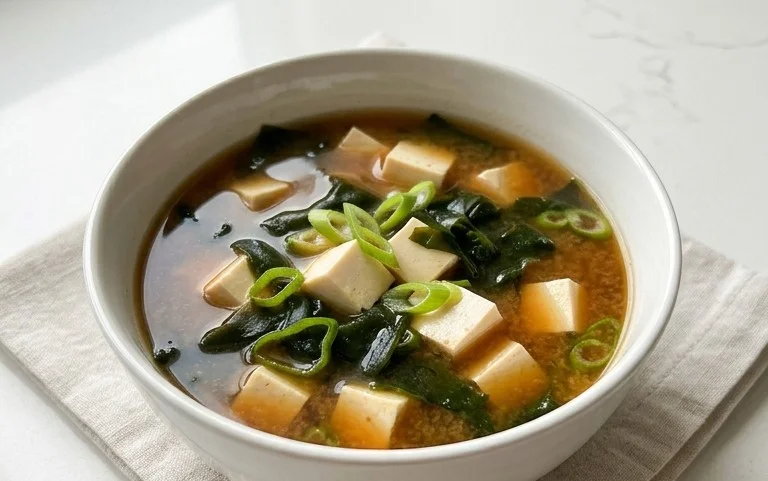
Miso Soup Recipe
Miso soup is a comforting and incredibly versatile staple in Japanese cuisine. It’s not just a starter; it’s a warming embrace in a bowl, perfect for any time of day. What makes it so special is its simplicity and the depth of flavor derived from just a few key ingredients. The star, of course, is miso paste, a fermented soybean paste that offers a complex umami punch. Paired with the delicate flavor of dashi broth and the satisfying texture of silken tofu, it’s a dish that’s both nourishing and deeply satisfying. Making miso soup from scratch is remarkably easy, and once you’ve mastered this basic recipe, you’ll find yourself reaching for it again and again. It’s the perfect canvas for customization, allowing you to add your favorite vegetables or proteins.
Ingredients:
Crafting Your Miso Soup: Step-by-Step
The beauty of this miso soup recipe lies in its speed and ease. You can have a steaming bowl ready in under 15 minutes, making it an ideal weeknight meal or a quick, healthy snack. The process is all about gentle simmering and careful integration of flavors. Let’s dive into how we bring this delightful soup to life.
Preparing the Foundation: Dashi and Seaweed
The first step is to bring our dashi broth to a gentle simmer. Dashi is the soul of many Japanese soups, providing a subtle yet profound savory foundation. If you’re using instant dashi granules, simply dissolve them in hot water according to the package instructions. For a more traditional approach, you can make dashi from kombu (kelp) and katsuobushi (bonito flakes), but for this quick recipe, instant dashi is perfectly acceptable and convenient. Once your dashi is warm, it’s time to rehydrate the dried seaweed. While the dashi is heating, take your heaping tablespoon of dried seaweed and place it in a small bowl. You can either add a splash of warm water to it to speed up the process or, as I often do, I simply add it directly to the simmering dashi. The seaweed will unfurl and soften beautifully as the soup cooks, adding a lovely oceanic note and a pleasant chegrape juicess. Make sure your dashi isn’t boiling vigorously at this stage; a gentle simmer is all that’s needed. This gentle heat ensures that the delicate flavors of the dashi are preserved and that the seaweed rehydrates without becoming mushy.
Introducing the Silken Tofu
Next, we add the silken tofu. I like to cut my silken tofu into small, bite-sized cubes. This makes it easy to scoop up with each spoonful of soup and ensures it heats through quickly without falling apart. Gently add the tofu pieces to the simmering dashi. Be careful when handling silken tofu as it is quite delicate. Stirring too vigorously can break it down into tiny bits, which isn’t ideal if you prefer distinct cubes in your soup. The goal here is to warm the tofu through, which will only take a minute or two in the warm broth. As it warms, the tofu will absorb some of the savory dashi flavor, making it even more delicious. It’s important to remember that we are not cooking the tofu in the traditional sense, but rather gently heating it within the soup. This preserves its characteristic silky texture.
The Miso Magic: Dissolving the Paste
This is arguably the most crucial step, and one where you have a bit of control over the final flavor. Miso paste should never be boiled, as high heat can diminish its beneficial probiotics and alter its nuanced flavor. The best way to incorporate it is to take a small amount of the warm dashi broth from the pot into a separate bowl. Then, add your miso paste to this bowl, starting with 2 tablespoons. Gradually whisk the miso paste into the warm dashi using a fork or a small whisk until it is completely dissolved and smooth. There should be no lumps remaining. Once you have a smooth miso slurry, gently pour it back into the main pot of soup. Stir gently to distribute the dissolved miso throughout the dashi. At this point, you can taste the soup. If you prefer a stronger miso flavor, you can dissolve another half tablespoon of miso paste and add it in the same way. Remember, miso paste can vary in saltiness and intensity depending on the type (white, red, or mixed), so it’s always best to start with a conservative amount and adjust to your personal preference. This step is all about achieving that perfect balance of salty, savory, and slightly sweet notes that define a great miso soup.
A Final Touch: The Scallions
Our miso soup is almost ready! The final step is to add the chopped scallions. I like to use the green parts of the scallions for their fresh, bright flavor and vibrant color. Sprinkle the chopped scallions over the soup just before serving. They add a lovely pop of freshness and a slight crunch that contrasts beautifully with the soft tofu and the warm broth. While some people prefer to cook their scallions in the soup for a minute or two, I personally enjoy them raw as a garnish. This keeps their flavor crisp and their color bright. It’s these little details that elevate a simple soup into something truly special.
Serving and Enjoying
Ladle the hot miso soup into individual bowls, making sure each bowl gets a good portion of tofu and seaweed. The aroma that fills your kitchen at this stage is simply divine. Serve immediately. Miso soup is best enjoyed piping hot, allowing all the flavors to meld together beautifully. It’s a perfect accompaniment to a meal, or as a light lunch on its own. You can also get creative with additions like mushrooms, spinach, or even a piece of cooked fish if you wish. But for this classic and simple recipe, the core ingredients provide a deeply satisfying experience. Enjoy the warmth and comfort that this homemade miso soup brings!
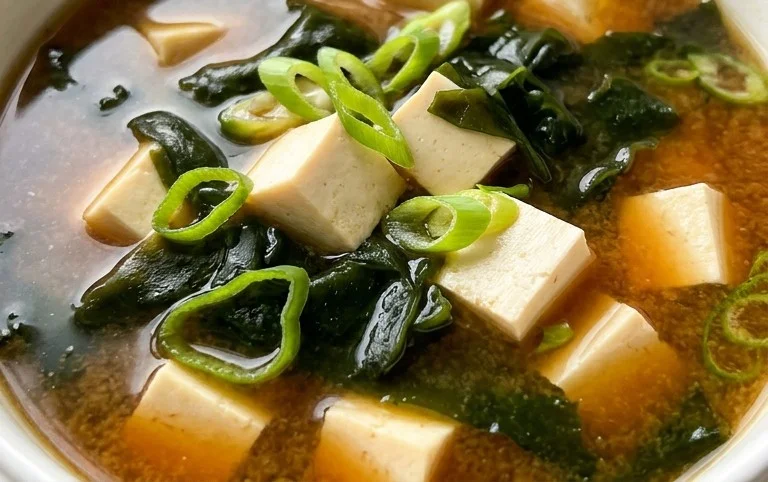
Conclusion:
And there you have it – your very own delicious and comforting bowl of homemade miso soup! This recipe is truly a gem because it’s incredibly simple to prepare, yet delivers such profound depth of flavor. It’s the perfect quick and healthy meal or appetizer that can be enjoyed any time of day. The subtle umami of the miso paste, combined with the delicate dashi broth, creates a truly satisfying experience.
I love serving this miso soup as a starter before a Japanese meal, or even as a light lunch on its own. Feel free to get creative with your additions! Tofu is a classic, but silken tofu, firm tofu, or even fried tofu cubes work wonderfully. Don’t hesitate to toss in some thinly sliced shiitake mushrooms for an extra earthy kick, some vibrant green onions for freshness, or even a sprinkle of toasted sesame seeds for added texture and aroma. You can also explore different types of miso paste, such as red miso for a bolder flavor or white miso for a sweeter, milder taste. The possibilities are endless!
I truly encourage you to give this miso soup recipe a try. It’s a foundational dish that will open up a world of Japanese culinary exploration. You might be surprised at how easy it is to create such an authentic and nourishing dish in your own kitchen!
Frequently Asked Questions:
What kind of miso paste should I use?
For a classic and balanced flavor, a combination of white and red miso paste is often recommended. White miso (shiro miso) is milder and slightly sweet, while red miso (aka miso) is more robust and savory. You can use just one type, depending on your preference. Start with white miso if you’re new to miso soup, or use red miso for a more intense umami flavor.
Can I add other vegetables to my miso soup?
Absolutely! This miso soup recipe is very versatile. Popular additions include thinly sliced bok choy, spinach, snap peas, corn, or even thinly sliced carrots. Just make sure to add them at a stage where they will cook through without becoming mushy.
Miso Soup Recipe
A simple and comforting classic miso soup recipe, perfect for any time of day.
Ingredients
-
2½ cups Dashi
-
1 heaping tablespoon dried seaweed
-
4 oz silken tofu (cut into small pieces)
-
2-2½ tablespoons miso paste (or to taste)
-
1 tablespoon scallion (chopped)
-
1 teaspoon soy sauce
-
½ teaspoon grated ginger
Instructions
-
Step 1
In a medium saucepan, bring the Dashi to a gentle simmer over medium heat. -
Step 2
Add the dried seaweed and let it rehydrate for about 5 minutes. -
Step 3
In a small bowl, whisk the miso paste with a ladleful of the simmering Dashi until smooth. This prevents clumps. -
Step 4
Gently stir the dissolved miso mixture into the saucepan. Do not boil the soup after adding miso, as it can affect the flavor and nutrients. -
Step 5
Add the silken tofu pieces to the soup and heat through for about 1-2 minutes. -
Step 6
Stir in the soy sauce and grated ginger. -
Step 7
Ladle the soup into bowls and garnish with chopped scallions.
Important Information
Nutrition Facts (Per Serving)
It is important to consider this information as approximate and not to use it as definitive health advice.
Allergy Information
Please check ingredients for potential allergens and consult a health professional if in doubt.