Easy Pickled Red Onions- Quick & Delicious Recipe
Pickled red onions are an absolute game-changer in my kitchen, and I’m so excited to share this vibrant recipe with you! If you’ve ever wondered about that burst of tangy, sweet, and slightly pungent flavor that elevates everything from tacos to salads, you’ve likely encountered these beauties. They’re the secret weapon that transforms ordinary meals into something truly special. What I love most about pickled red onions is their versatility. They add a delightful crunch and a beautiful pop of color to almost any dish. It’s incredible how a simple combination of onions, vinegar, and a touch of sugar can create such a complex and satisfying flavor profile. Forget those store-bought versions that can be overly sweet or artificial tasting; making your own pickled red onions at home is incredibly easy and unbelievably rewarding. Get ready to discover why these zesty little rings will become your new favorite condiment!
Pickled Red Onions
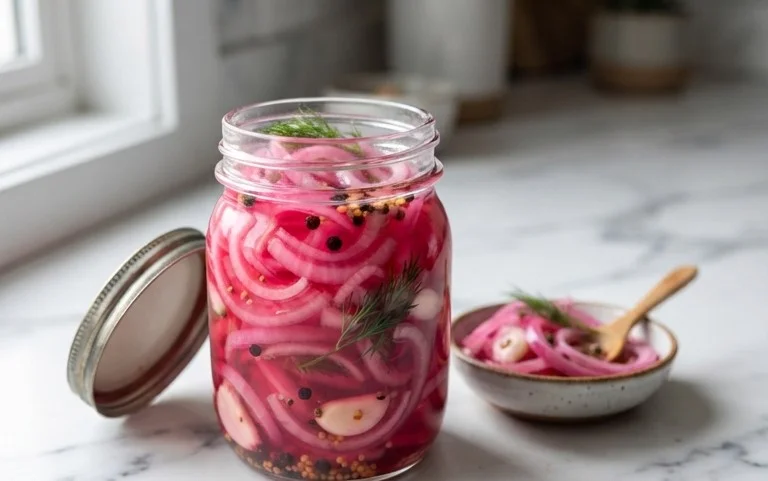
There’s something truly magical about pickled red onions. They transform a simple dish into something vibrant and zesty, adding a pop of color and a delightful tangy crunch. Whether you’re topping tacos, adding a bright note to salads, or elevating a simple sandwich, these pickled beauties are an absolute game-changer. They’re incredibly easy to make, requiring minimal effort and a few pantry staples. The best part? You can whip up a batch in under an hour, and they’ll keep in your refrigerator for weeks, ready to pounce on any meal that needs a little something extra. I love having a jar of these on hand at all times; they’ve become a staple in my kitchen for good reason.
Ingredients:
Preparing Your Onions
The first step is to prepare your red onions. You’ll want to peel them, which can sometimes be a little fiddly, but a sharp knife helps. Once peeled, you’ll need to slice them thinly. The key here is consistency. I find that slicing them into rings about 1/8-inch thick works best. You can do this with a mandoline slicer for ultimate uniformity, which I highly recommend if you have one. If not, a sharp chef’s knife and a steady hand will do the trick. The thinner you slice them, the quicker they will pickle and the more tender they will become. Avoid thick chunks, as they won’t absorb the brine as effectively. Once sliced, separate the rings so they are individual pieces, not still clumped together. This ensures each ring gets coated in the pickling brine.
Creating the Pickling Brine
Now, let’s get to the heart of the matter: the pickling brine. This is where all the magic happens. In a medium saucepan, combine the water, white vinegar, sugar, and sea salt. If you’re opting for a little heat, now’s the time to add your red pepper flakes. I often use just 1/4 teaspoon for a gentle warmth, but if you like things spicier, feel free to go up to 1/2 teaspoon. Gently stir everything together until the sugar and salt are mostly dissolved.
Heating and Infusing the Brine
Place the saucepan over medium heat. You want to bring the mixture to a gentle simmer. It doesn’t need to boil vigorously, just get hot enough to dissolve the remaining sugar and salt and to start infusing the flavors. Keep stirring occasionally as it heats. Once the brine is hot and everything is dissolved, remove it from the heat. This is crucial – you don’t want to cook the onions, just have the hot brine work its magic on them. Let the brine sit for a minute or two off the heat to cool down slightly, but it should still be quite warm when you proceed to the next step.
Packing and Brining the Onions
While the brine is heating, take a clean glass jar or a heat-safe container. I prefer using a mason jar with a lid for easy storage. Add your prepared red onion rings to the jar. Don’t pack them in too tightly; you want to ensure the brine can circulate freely around all the onion slices. Once the brine is ready, carefully pour the hot liquid over the onions in the jar. Make sure all the onions are submerged in the brine. If some are floating, you can gently push them down with a spoon.
The Waiting Game (and the Magic)
Now comes the hardest part: waiting! Once the jar has cooled to room temperature, secure the lid tightly and place it in the refrigerator. The real magic happens as the onions sit and soak up all those wonderful flavors. You’ll start to see them change color and soften within the first hour. For the best flavor and texture, I recommend letting them pickle for at least 30 minutes to an hour before enjoying them. However, they will continue to develop flavor and become more tender the longer they sit. They are typically best after at least 2-3 hours, and they will continue to be delicious for up to 2-3 weeks in the refrigerator. The initial pickling process is quite fast, but the flavor deepens significantly over time. Don’t be tempted to eat them all at once, though I know it’s hard!
Notes on Sugar
You can use a variety of sugars here, and each will impart a slightly different flavor profile. Granulated white sugar is the standard and provides a clean sweetness. Cane sugar offers a richer, slightly more caramel-like note. Coconut sugar will add a subtle depth and a hint of molasses. I’ve also had success with maple syrup in a pinch, though you’ll want to reduce the amount slightly as it’s more potent. Experiment with what you have on hand or what you prefer!
Conclusion:
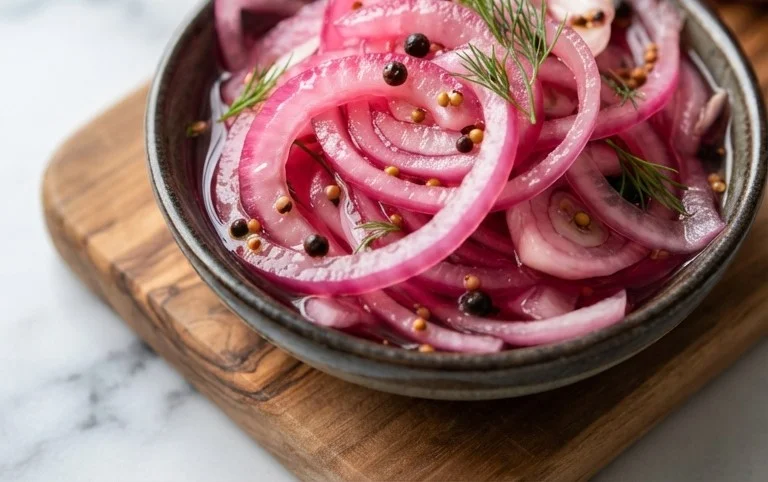
There you have it! Crafting your own batch of vibrant, tangy pickled red onions is a surprisingly simple yet incredibly rewarding culinary adventure. The magic of this recipe lies in its ability to transform humble red onions into a flavor powerhouse, adding a delightful pop of acidity and color to almost any dish. They’re not just beautiful to look at; they’re a versatile condiment that elevates everything from tacos and salads to sandwiches and charcuterie boards. I truly encourage you to give these pickled red onions a try. You’ll be amazed at how often you reach for them once you have a jar ready to go!
Beyond the classic brine, feel free to experiment! A pinch of chili flakes can add a subtle warmth, while a sprig of fresh dill can introduce an herbaceous note. Even a touch of honey can balance the acidity for a slightly sweeter profile. The possibilities are as vast as your imagin extractation, making this a truly adaptable staple.
Frequently Asked Questions:
How long do pickled red onions last?
When stored properly in an airtight container in the refrigerator, your pickled red onions can last for up to 2-3 weeks. The longer they sit, the more the flavors will meld and deepen.
Can I reuse the pickling liquid?
While you can technically reuse the pickling liquid for another small batch, the flavor will be less potent the second time around. It’s generally best to start with a fresh brine for optimal results.
What else can I use pickled red onions on besides tacos?
The versatility is astounding! Try them on avocado toast, alongside grilled meats, stirred into potato salad, topping burgers, as a component of a grain bowl, or even mixed into cream cheese for a savory spread. They are a fantastic way to introduce a burst of flavor to your meals.
Pickled Red Onions
Quick and easy pickled red onions to add a zesty crunch to any dish. Perfect for tacos, sandwiches, salads, and more.
Ingredients
-
2 medium red onions, thinly sliced
-
1 1/4 cup water
-
1 1/4 cup white vinegar
-
3 tbsp sugar
-
1 tbsp sea salt
-
1/4-1/2 tsp red pepper flakes
Instructions
-
Step 1
Thinly slice the red onions. -
Step 2
In a small saucepan, combine water, white vinegar, sugar, and sea salt. Stir until sugar and salt are dissolved. -
Step 3
Bring the mixture to a simmer over medium heat. Cook for 1-2 minutes until sugar and salt are fully dissolved. -
Step 4
Place the sliced onions in a heatproof jar or bowl. -
Step 5
Pour the hot pickling liquid over the onions. Add red pepper flakes if using. -
Step 6
Ensure onions are submerged. Let cool at room temperature for at least 30 minutes before serving. For best flavor, refrigerate for a few hours or overnight.
Important Information
Nutrition Facts (Per Serving)
It is important to consider this information as approximate and not to use it as definitive health advice.
Allergy Information
Please check ingredients for potential allergens and consult a health professional if in doubt.