
Strawberry Lemonade Cake-Sweet & Zesty Summer Treat
Strawberry Lemonade Cake is the ultimate taste of summer sunshine, a delightful symphony of sweet berries and zesty citrus that promises to brighten any occasion. We all crave that perfect dessert that’s both refreshing and decadent, and this Strawberry Lemonade Cake absolutely delivers. It’s the kind of treat that brings a collective sigh of happiness with the first bite. What makes this particular Strawberry Lemonade Cake so special? It’s the incredible balance – the tartness of the fresh lemon cutting through the creamy sweetness of the strawberries, creating a flavor profile that’s utterly irresistible. Imagin extracte a light, fluffy cake infused with vibrant lemon flavor, studded with juicy bursts of strawberry, and topped with a luscious lemonade-inspired frosting. It’s a dessert that feels both elegant enough for a celebration and comforting enough for a simple afternoon indulgence. Get ready to fall in love!

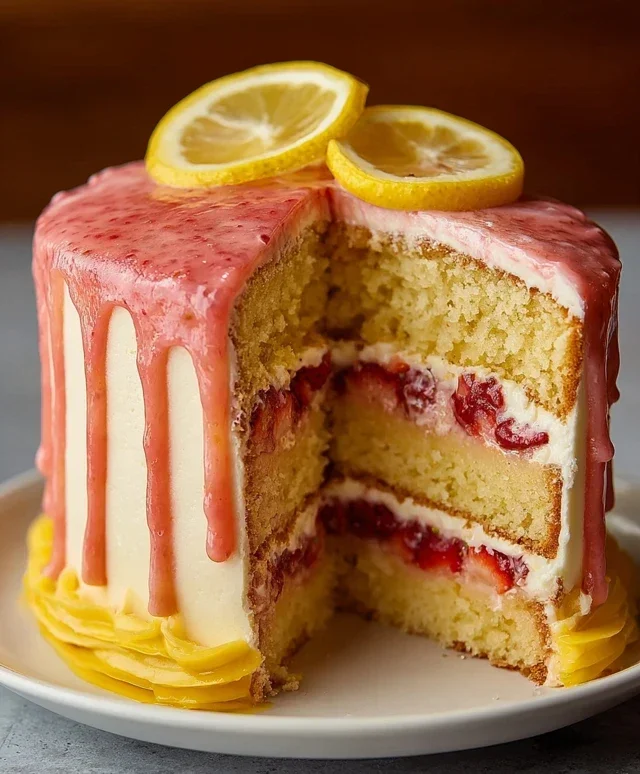
Strawberry Lemonade Cake
Get ready to delight your senses with this utterly refreshing Strawberry Lemonade Cake. This isn’t just any cake; it’s a burst of sunshine, a playful dance between tart lemon and sweet strawberries, all wrapped up in a tender, moist crum extractb. We’re talking about a cake that tastes like summer, no matter the season. The vibrant colors, the zesty aroma, and the layered flavors of strawberry compote, fluffy Swiss buttercream, and creamy mascarpone frosting will have everyone beggin extractg for a slice, and then another! Perfect for birthdays, picnics, or simply when you need a little extra joy in your day, this cake is a guaranteed crowd-pleaser.
Ingredients:
Baking the Cake
Step 1: Prepare Your Workspace and Dry Ingredients
Before we even think about mixing, let’s get organized. Preheat your oven to 175°C (350°F). Grease and flour two 8-inch round cake pans, or line them with parchment paper. This ensures our beautiful cakes won’t stick. In a medium bowl, whisk together the all-purpose flour, cornstarch, baking powder, baking soda, and fine salt. The cornstarch is our little secret weapon here, adding to the cake’s tenderness and keeping it incredibly light. Whisking these dry ingredients ensures they’re evenly distributed, preventing any pockets of baking soda or powder in your finished cake. Set this aside for now.
Step 2: Cream the Butter and Sugar
In a large bowl, using an electric mixer, beat the softened unsalted butter until it’s pnon-alcoholic ale and creamy. This usually takes about 2-3 minutes. Gradually add the powdered sugar, a little at a time, beating well after each addition. Continue to beat on medium-high speed until the mixture is light and fluffy, resembling smooth clouds. This creaming process is crucial for a cake with a fine crum extractb. Don’t rush it! The air incorporated at this stage will contribute significantly to the cake’s texture. Scrape down the sides of the bowl occasionally to ensure everything is incorporated.
Step 3: Incorporate Eggs and Flavorings
With the mixer on low speed, add the medium eggs one at a time, beating well after each addition. It’s important that your eggs are at room temperature, as they emulsify better with the butter and sugar mixture, leading to a smoother batter and a more tender cake. If your eggs are cold, you can quickly warm them by placing them in a bowl of warm (not hot) water for about 5 minutes. Next, stir in the vanilla extract and the lemon juice and zest. The zest is where all that potent lemon oil lives, so don’t skip it! The fresh lemon scent will start to perfume your kitchen beautifully.
Step 4: Alternate Dry and Wet Ingredients
Now, it’s time to bring everything together. With the mixer on low speed, begin extract to alternately add the dry ingredients and the buttermilk to the butter-sugar-egg mixture. Start by adding about one-third of the dry ingredients, mixing until just combined. Then, add half of the buttermilk, mixing again. Continue this process, adding another third of the dry ingredients, the remaining buttermilk, and finally, the last third of the dry ingredients. Mix until just combined, being careful not to overmix. Overmixing develops the gluten in the flour, which can result in a tough cake. A few streaks of flour are okay; they’ll disappear during baking.
Step 5: Bake and Cool
Divide the batter evenly between the prepared cake pans. Gently tap the pans on the counter a couple of times to release any large air bubbles. Bake in the preheated oven for 25-30 minutes, or until a wooden skewer or toothpick inserted into the center comes out clean. The tops should be golden brown and spring back lightly when touched. Once baked, let the cakes cool in their pans for about 10-15 minutes before carefully inverting them onto a wire rack to cool completely. It’s vital that the cakes are completely cool before you even think about frosting them, otherwise, your beautiful buttercream will melt into a greasy mess.
Assembly and Decoration
Once your cake layers are completely cool, it’s time for the fun part – assembly and decoration! Place one cake layer on your serving plate or cake stand. Spread a generous layer of your delicious homemade strawberry compote over the top. Make sure to leave a small border around the edge so the compote doesn’t ooze out too much when you add the next layer. Carefully place the second cake layer on top.
Now, it’s time for the Strawberry Swiss Buttercream. Generously frost the top and sides of the cake with this luscious frosting. Smooth it out with an offset spatula for a clean finish, or create rustic swirls for a more casual look. To add an extra touch of elegance and flavor, we’ll finish with the Lemon Mascarpone Frosting. Dollop spoonfuls of the mascarpone frosting over the buttercream, and gently swirl them together. This creates a beautiful marbled effect and adds another layer of creamy, tangy deliciousness. Finally, melt the 50g of white chocolate gently (you can do this in a double boiler or in short bursts in the microwave, stirring in between). Drizzle the melted white chocolate over the top of the cake, letting it drip down the sides for a dramatic finish. For an extra pop of color, you can garnish with a few fresh strawberries or a sprinkle of lemon zest. Enjoy every single bite of this spectacular Strawberry Lemonade Cake!
Conclusion:
So there you have it – your guide to creating a truly sensational Strawberry Lemonade Cake! This recipe is fantastic because it perfectly balances the sweet, juicy notes of fresh strawberries with the bright, zesty tang of lemon. The result is a moist, tender cake that’s both refreshing and delightfully indulgent. It’s the ideal dessert for spring picnics, summer celebrations, or simply when you need a burst of sunshine in your day. Serve it simply dusted with powdered sugar, or go all out with a creamy lemon buttercream or a swirl of strawberry whipped cream. Don’t be afraid to experiment with variations either! You could fold in some fresh blueberries, add a hint of mint, or even infuse the syrup with basil for a more complex flavor profile. I truly encourage you to give this Strawberry Lemonade Cake a try; I promise you won’t be disappointed by its vibrant flavors and delightful texture.
Frequently Asked Questions:
Can I use frozen strawberries instead of fresh?
Yes, you absolutely can! If using frozen strawberries, make sure to thaw them completely and drain off any excess liquid before folding them into the batter. This helps prevent the cake from becoming too wet.
What kind of frosting pairs best with this cake?
While a classic lemon buttercream or a strawberry cream cheese frosting are excellent choices, a simple whipped cream infused with a little lemon zest and strawberry puree is also wonderfully light and complementary. For an even more intense strawberry flavor, consider a strawberry glaze.
How should I store leftover Strawberry Lemonade Cake?
Store any leftover cake in an airtight container at room temperature for up to 2 days, or in the refrigerator for up to 4 days. If refrigerating, let it come to room temperature before serving for the best texture.
Strawberry Lemonade Cake
A delightful and refreshing cake bursting with the bright flavors of strawberry and lemon, perfect for any occasion.
Ingredients
-
150 g unsalted butter, softened
-
280 g powdered sugar
-
3 medium eggs, at room temperature
-
1 1/2 tsp vanilla extract
-
260 g all-purpose flour
-
10 g cornstarch
-
1 1/2 tsp baking powder
-
1/2 tsp baking soda
-
1/4 tsp fine salt
-
210 ml buttermilk
-
Juice of 1/2 lemon and zest
-
Homemade strawberry compote
-
Homemade Strawberry Swiss Buttercream
-
Lemon Mascarpone Frosting (homemade)
-
50 g white chocolate
Instructions
-
Step 1
Preheat oven to 175°C (350°F). Grease and flour two 8-inch round cake pans. -
Step 2
In a large bowl, cream together the softened butter and powdered sugar until light and fluffy. -
Step 3
Beat in the eggs one at a time, followed by the vanilla extract. -
Step 4
In a separate bowl, whisk together the all-purpose flour, cornstarch, baking powder, baking soda, and salt. -
Step 5
Gradually add the dry ingredients to the wet ingredients alternately with the buttermilk, beginning and ending with the dry ingredients. Stir in the lemon juice and zest. -
Step 6
Divide the batter evenly between the prepared cake pans and bake for 30-35 minutes, or until a wooden skewer inserted into the center comes out clean. -
Step 7
Let the cakes cool in the pans for 10 minutes before inverting them onto a wire rack to cool completely. -
Step 8
Once cooled, frost the cake with Homemade Strawberry Swiss Buttercream and Lemon Mascarpone Frosting. Layer with homemade strawberry compote between the cake layers and top with melted white chocolate drizzle.
Important Information
Nutrition Facts (Per Serving)
It is important to consider this information as approximate and not to use it as definitive health advice.
Allergy Information
Please check ingredients for potential allergens and consult a health professional if in doubt.