Dark Chocolate Sea Salt Nut Bars – Easy Treat
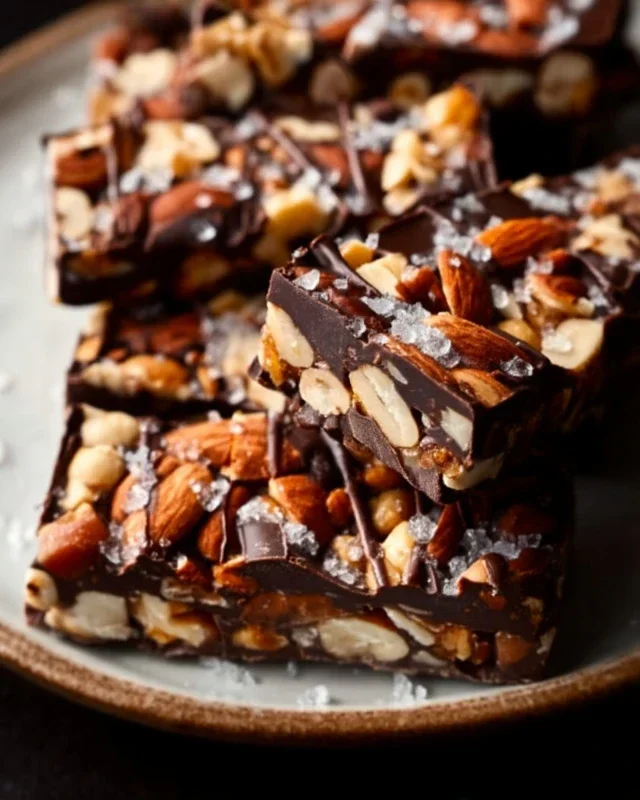
Dark Chocolate and Sea Salt Nut Bars are the ultimate treat that strikes the perfect balance between sweet, salty, and satisfyingly crunchy. If you’re anything like me, you crave a snack that feels both indulgent and nourishing, and these bars deliver in spades. The rich, deep flavor of dark chocolate melts beautifully into the toasted nuts, creating a complex and utterly irresistible combination. But what truly elevates these Dark Chocolate and Sea Salt Nut Bars is the unexpected pop of sea salt. It’s that little spark of salinity that cuts through the sweetness, awakening your taste buds and making every bite an adventure. Forget processed granola bars; these homemade beauties are packed with wholesome goodness and a flavor profile that will have you reaching for another one before you even realize it. Get ready to experience your new favorite go-to snack, perfect for an afternoon pick-me-up, a pre-workout boost, or simply a moment of pure deliciousness.
Why You’ll Love These Bars
The Perfect Harmony of Flavors
Dark Chocolate and Sea Salt Nut Bars
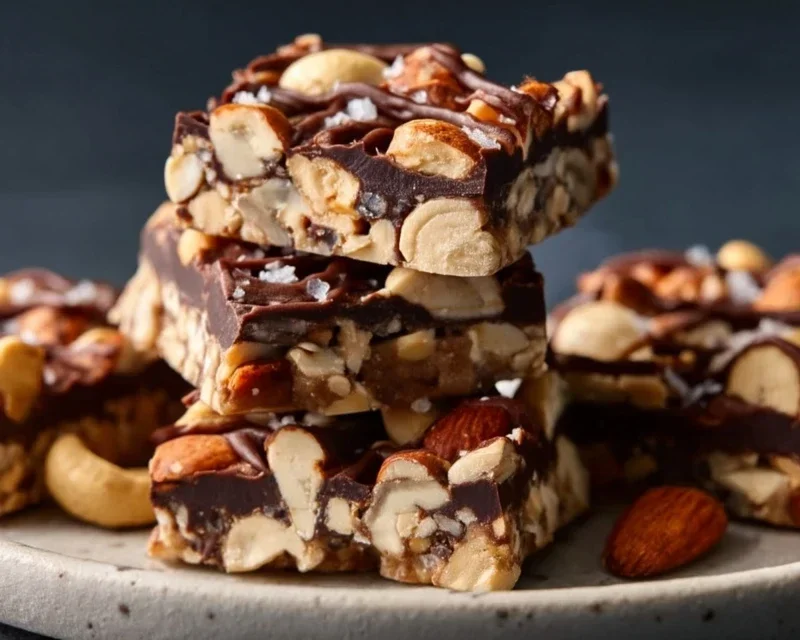
There’s something incredibly satisfying about a homemade snack, especially one that strikes the perfect balance between sweet, salty, and nutty. These Dark Chocolate and Sea Salt Nut Bars are my go-to when I need a quick energy boost or a decadent treat that feels both wholesome and indulgent. They’re surprisingly easy to make, requiring no baking whatsoever, and the combination of crunchy nuts, chewy rice puffs, rich dark chocolate, and a hint of sea salt is simply irresistible. This recipe is incredibly adaptable, too. While I’ve listed my preferred nut blend, feel free to experiment with your favorites – walnuts, pecans, pistachios, or even a mix of seeds like pumpkin or sunflower seeds would be delicious. The key is to get a good variety of textures and flavors to make each bite interesting.
These bars are perfect for on-the-go snacking, packing in lunchboxes, or simply enjoying with a cup of coffee or tea. They store well in the refrigerator, making them a fantastic make-ahead treat for busy weeks. The dark chocolate drizzle adds a touch of elegance and extra chocolatey goodness, while the flaky sea salt sprinkled on top elevates the whole experience, cutting through the sweetness and enhancing all the other flavors.
Ingredients:
Instructions:
Prepare Your Nuts:
The first step is to get your nuts ready. If you’re using a variety like I do, make sure they’re all unsalted. I like to give my nuts a rough chop. This ensures they’re still chunky enough to provide a good bite, but small enough to distribute evenly throughout the bars. You don’t want huge nut halves; aim for pieces that are roughly the size of a peanut. You can do this by hand with a sharp knife on a cutting board, or if you prefer, pulse them gently in a food processor a few times. Be careful not to over-process them into a paste! Transfer your chopped nuts to a large mixing bowl.
Combine the Dry Ingredients:
Next, we’ll add the puffed rice to the bowl with the nuts. This ingredient is crucial for providing that wonderful airy crunch and binding everything together. Measure out your 1/2 cup of puffed rice and gently fold it in with the nuts. Now, it’s time to add the 1/2 teaspoon of sea salt. This might seem like a lot for a dry mixture, but it will be distributed throughout the bars and is essential for bringin extractg out the flavors of the nuts and chocolate. Stir everything together gently to ensure the puffed rice and salt are evenly distributed amongst the nuts.
Create the Binding Syrup:
In a separate, smaller saucepan, we’re going to gently warm the brown rice syrup. Place the saucepan over low heat. You only want to warm it enough to make it more pliable and easier to mix. Don’t let it boil or get too hot, as this can change its consistency and make it harder to work with. Once it’s warm and slightly runny, remove it from the heat. Now, stir in the 1 1/2 teaspoons of vanilla extract. The vanilla adds a lovely depth of flavor that complements both the nuts and the chocolate beautifully.
Bring It All Together:
Pour the warm brown rice syrup and vanilla mixture over the dry ingredients in the large bowl. Using a sturdy spatula or a wooden spoon, begin extract to mix everything together. This is the most important part of ensuring your bars hold their shape. You want to coat all the nuts and puffed rice evenly with the syrup. It might take a bit of stirring and pressing to make sure every piece is coated. The mixture will become quite sticky and clumpy, which is exactly what you want. Keep mixing until you have a cohesive mass. Don’t be afraid to get your hands in there if it makes it easier to ensure everything is well incorporated.
Press and Chill:
Line an 8×8 inch baking pan with parchment paper, leaving some overhang on the sides to make it easy to lift the bars out later. This step is crucial to prevent sticking. Once your pan is lined, transfer the nut mixture into the prepared pan. Now comes the pressing. Use the back of your spatula, or even a piece of parchment paper placed on top of the mixture, to firmly press the mixture down into an even layer. The more compact you get the mixture, the better your bars will hold together. Once it’s pressed firmly and evenly, place the pan in the refrigerator for at least 1 hour, or until it’s firm to the touch. This chilling process is essential for the bars to set properly before you cut them.
Melt the Chocolate and Finish:
While your bars are chilling, you can prepare the chocolate drizzle. In a microwave-safe bowl, combine the 1 cup of dark chocolate chips and the 2 teaspoons of coconut oil. Microwave in 30-second intervals, stirring well after each interval, until the chocolate is smooth and completely melted. Be careful not to overheat the chocolate, as it can seize. Alternatively, you can melt the chocolate and coconut oil in a double boiler over simmering water. Once melted, stir until it’s smooth and glossy.
Drizzle and Set:
Once the nut mixture has chilled and is firm, remove it from the refrigerator. Carefully lift the entire block out of the pan using the parchment paper overhang. Place it on a cutting board. Now, using a spoon or a piping bag, drizzle the melted dark chocolate evenly over the top of the nut mixture. If you’re using the optional flaky salt, sprinkle it over the melted chocolate while it’s still wet. This will help it adhere. Place the bars back into the refrigerator for another 30 minutes to allow the chocolate to set completely.
Cut and Enjoy:
Once the chocolate is firm, use a sharp knife to cut the large block into individual bars. You can make them as big or as small as you like. I usually cut mine into about 12-16 bars. Store the bars in an airtight container in the refrigerator for up to two weeks. They might soften slightly at room temperature, so keeping them chilled is best for maintaining their texture. Enjoy these delicious homemade treats!
Conclusion:
There you have it – your guide to crafting these utterly irresistible Dark Chocolate and Sea Salt Nut Bars! These bars are a true testament to simple ingredients coming together for an explosion of flavor and texture. The rich bitterness of dark chocolate perfectly balances the sweetness of your chosen nuts and dried fruits, while the flaky sea salt adds that addictive savory counterpoint that makes you reach for just one more. They’re incredibly versatile, making them ideal for a quick breakfast on the go, a satisfying afternoon pick-me-up, or a decadent (yet still somewhat wholesome!) dessert. You can easily customize them with your favorite nuts like almonds, walnuts, or pecans, and swap out dried fruits to suit your palate. I truly encourage you to give these Dark Chocolate and Sea Salt Nut Bars a try; you won’t regret the delicious results!
Frequently Asked Questions:
Can I make these nut bars vegan?
Absolutely! To make these Dark Chocolate and Sea Salt Nut Bars vegan, ensure you use vegan dark chocolate chips (check the ingredients for dairy) and a plant-based binder if your recipe calls for something like honey. Maple syrup or agave nectar are excellent vegan alternatives. Many nuts and dried fruits are naturally vegan, so the core of the recipe should already be compliant.
How long do these nut bars last?
When stored properly in an airtight container at room temperature, these nut bars typically last for about a week to ten days. For longer storage, you can keep them in the refrigerator, where they’ll stay fresh for up to two weeks. They also freeze wonderfully for up to three months, making them a great make-ahead snack.
What kind of nuts are best for these bars?
The beauty of these bars is their adaptability! While a mix of almonds and walnuts offers a lovely crunch and depth, feel free to experiment. Pecans, cashews, macadamia nuts, or even pistachios would be delicious additions or substitutions. Just aim for a combination that provides a good textural contrast and flavor profile that you enjoy with dark chocolate.
Dark Chocolate and Sea Salt Nut Bars
Delicious and chewy nut bars packed with your favorite nuts, puffed rice, and finished with a drizzle of dark chocolate and flaky sea salt. A perfect no-bake treat.
Ingredients
-
2 1/2 cups unsalted nuts of choice (3/4 cup cashews, 3/4 cup peanuts, 1 cup almonds)
-
1/2 cup puffed rice
-
1/4 cup brown rice syrup
-
1 1/2 teaspoon vanilla extract
-
1/2 teaspoon sea salt
-
1 cup dark chocolate chips
-
2 teaspoons coconut oil
-
flaky salt for topping (optional)
Instructions
-
Step 1
Line an 8×8 inch baking pan with parchment paper, leaving an overhang on the sides for easy removal. -
Step 2
In a large bowl, combine the unsalted nuts and puffed rice. -
Step 3
In a small saucepan, gently heat the brown rice syrup and vanilla extract over medium-low heat until warm. Stir in the sea salt. -
Step 4
Pour the warm syrup mixture over the nut and puffed rice mixture. Stir well to coat everything evenly. -
Step 5
Press the mixture firmly and evenly into the prepared baking pan. -
Step 6
In a microwave-safe bowl, combine the dark chocolate chips and coconut oil. Microwave in 30-second intervals, stirring between each, until melted and smooth. -
Step 7
Drizzle the melted chocolate over the nut bars. If using, sprinkle with flaky salt. -
Step 8
Refrigerate for at least 1 hour, or until firm. Lift the bars out of the pan using the parchment paper and cut into desired sizes.
Important Information
Nutrition Facts (Per Serving)
It is important to consider this information as approximate and not to use it as definitive health advice.
Allergy Information
Please check ingredients for potential allergens and consult a health professional if in doubt.