Crispy Chicken Caesar Sandwich- The Ultimate Bite
Crispy Chicken Caesar Sandwich – it’s a name that conjures up images of pure sandwich perfection, doesn’t it? We all have those comfort foods, those dishes that just hit the spot every single time, and for me, the Crispy Chicken Caesar Sandwich is undeniably one of them. It’s the ultimate evolution of a beloved classic, transforming a familiar salad into a handheld marvel. What is it about this particular combination that makes it so irresistible? It’s the symphony of textures and flavors: the satisfying crunch of perfectly fried chicken, the creamy, tangy embrace of a zesty Caesar dressing, the crisp bite of romaine lettuce, and the rich, salty notes of Parmesan cheese, all nestled between soft, toasted bread. This isn’t just lunch; it’s an experience, a delightful indulgence that never fails to satisfy. It’s the perfect balance of hearty and fresh, making it a crowd-pleaser for any occasion. Get ready to elevate your sandwich game!
The Ultimate Crispy Chicken Caesar Sandwich Recipe
There’s something undeniably satisfying about a perfectly crispy chicken cutlet nestled between soft bread, elevated by the classic zing of Caesar dressing. This Crispy Chicken Caesar Sandwich takes everything you love about the salad and transforms it into a handheld masterpiece. Forget soggy fried chicken and bland dressings; we’re talking about a golden-brown, shatteringly crisp exterior, juicy chicken interior, and a homemade Caesar that’s bursting with flavor. It’s the ideal lunch, a fantastic weeknight dinner, or even an impressive dish to serve guests. Let’s get cooking!
Ingredients:
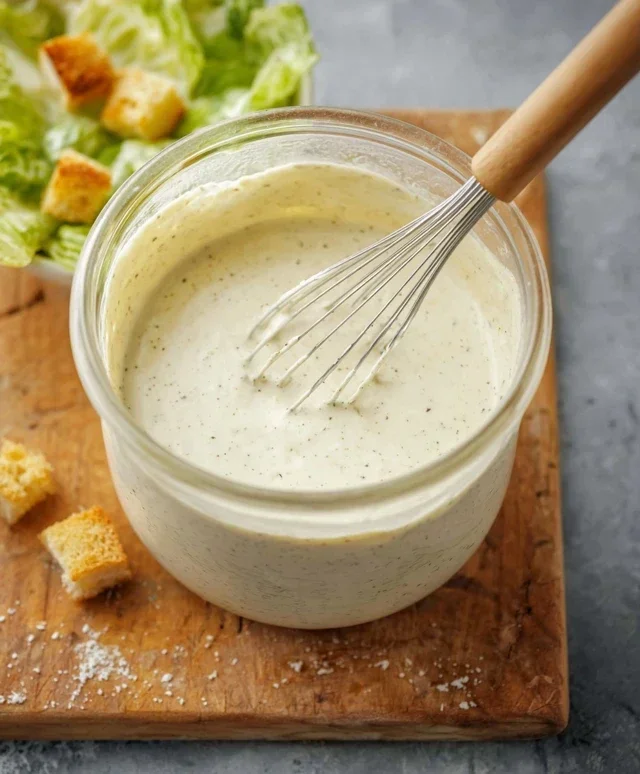
Crafting the Perfect Caesar Dressing
The secret to any great Caesar sandwich is, of course, the dressing. We’re ditching the bottled stuff for a fresh, vibrant homemade version that will wow your taste buds. In a medium bowl, whisk together the full-fat mayonnaise, Greek yogurt, Dijon mustard, Worcestershire sauce, and fresh lemon juice. The Greek yogurt adds a lovely tang and helps lighten the dressing without sacrificing creaminess. Next, stir in the freshly grated Parmesan cheese – using the real stuff makes a world of difference in flavor and texture. Then, add your minced garlic cloves. For a milder garlic flavor, you can finely mince them and let them sit in the lemon juice for a few minutes before adding them to the dressing. Finish with a ¼ teaspoon of black pepper and a pinch of sea salt. Taste and adjust seasonings as needed; you might want a little more lemon or salt depending on your preference. Cover and refrigerate this while you prepare the chicken, allowing the flavors to meld beautifully.
Preparing the Crispy Chicken Cutlets
Now, let’s talk about the star of the show: the chicken. We’re using chicken cutlets here because they cook quickly and evenly, ensuring a tender interior with a perfectly crisp coating. If you can’t find pre-cut cutlets, you can easily make your own by taking boneless, skinless chicken breasts and pounding them to about ½-inch thickness between two pieces of plastic wrap or parchment paper. This even thickness is crucial for consistent cooking.
Seasoning the Chicken
Before we coat the chicken, it’s essential to season it generously. Pat your chicken cutlets dry with paper towels. This step is vital for achieving maximum crispiness; excess moisture will steam the chicken instead of frying it. Season both sides of each cutlet with sea salt and ground black pepper. Don’t be shy with the salt and pepper – this is your foundational flavor for the chicken itself.
The Dredgin extractg Process for Ultimate Crispiness
For that irresistible crunch, we’re going to double-dredge our chicken cutlets. In a shallow dish or plate, combine the all-purpose flour with ½ teaspoon of salt. This seasoned flour will form the base of our crispy coating. In a separate shallow dish, beat one or two eggs (depending on the size of your cutlets – you want enough to coat them). We won’t use the egg in the provided ingredient list as it’s a common pantry item assumed for dredgin extractg, but it is crucial for this step. Dip each seasoned chicken cutlet first into the seasoned flour, ensuring it’s fully coated, and shake off any excess. Then, dip it into the beaten egg, letting any excess drip off. Finally, return the cutlet to the seasoned flour, pressing gently to ensure a thick, even coating. This double-dipping process creates a robust crust that will fry up beautifully golden brown and shatteringly crisp.
Frying the Chicken to Perfection
It’s time to bring on the heat! In a large, heavy-bottomed skillet, pour enough oil for shallow frying – you want about ½ to ¾ inch of oil in the pan. Heat the oil over medium-high heat until it reaches around 350-360°F (175-180°C). You can test the oil temperature by dropping a tiny bit of flour into it; if it sizzles immediately and floats, your oil is ready. Carefully place the coated chicken cutlets into the hot oil, making sure not to overcrowd the pan. Overcrowding will lower the oil temperature, resulting in greasy chicken. Fry the chicken for about 3-5 minutes per side, or until it’s golden brown and cooked through. The internal temperature should reach 165°F (74°C). Use tongs to carefully flip the chicken. Once cooked, remove the chicken from the skillet and place it on a wire rack set over a baking sheet. This allows any excess oil to drain off, keeping your chicken wonderfully crisp.
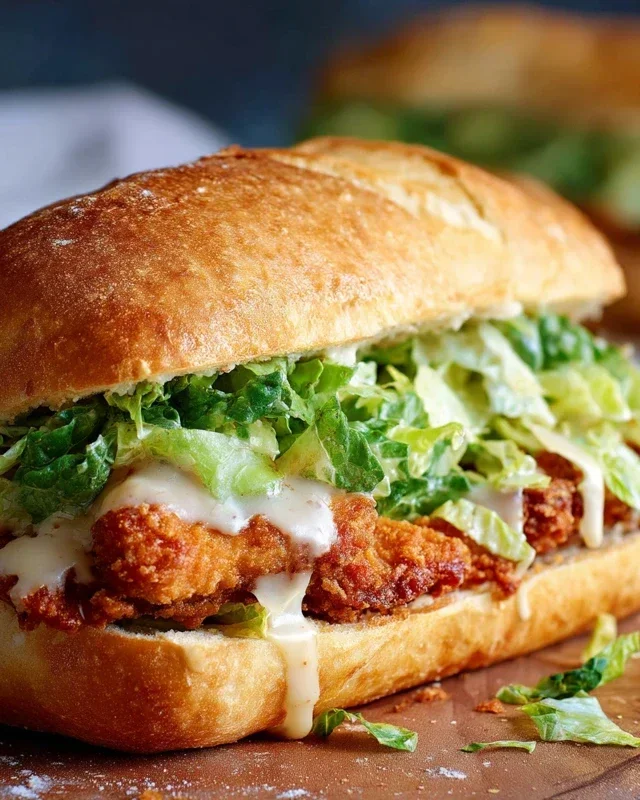
Assembling Your Masterpiece
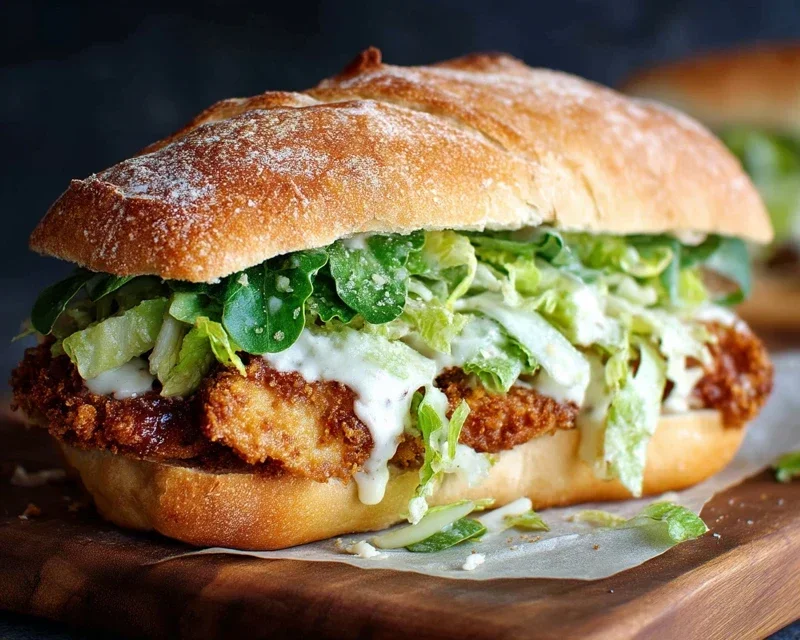
Now for the exciting part – building your ultimate Crispy Chicken Caesar Sandwich! Lightly toast your favorite sandwich rolls or sturdy bread slices. We love a good brioche bun or a crusty ciabatta for this. Spread a generous amount of your homemade Caesar dressing on both halves of the bread. Layer your perfectly crispy chicken cutlet on the bottom bun. Top the chicken with more Caesar dressing, a handful of crisp romaine lettuce (chopped or torn), and an extra sprinkle of grated Parmesan cheese for good measure. Crown it with the top bun and get ready for a flavor explosion. This sandwich is best enjoyed immediately while the chicken is still hot and the exterior is at its crispiest. Enjoy every delicious bite!
Conclusion:
And there you have it – the ultimate guide to crafting a truly sensational Crispy Chicken Caesar Sandwich! This recipe isn’t just about a meal; it’s about a flavor explosion. The satisfying crunch of perfectly fried chicken, the tangy zest of homemade Caesar dressing, the fresh bite of romaine, and the salty parmesan all coming together on a toasted bun is simply unbeatable. It’s a gourmet experience you can whip up right in your own kitchen, perfect for a quick and delicious lunch or a casual dinner that feels incredibly special. I truly encourage you to give this recipe a try; you won’t be disappointed!
For serving suggestions, this sandwich is fantastic on its own but also pairs wonderfully with a side of crispy sweet potato fries or a light, refreshing coleslaw. Don’t be afraid to get creative with variations! You could swap out the chicken for crispy tofu for a vegetarian option, add a sprinkle of chili flakes to the breading for a little heat, or even try a different cheese like provolone for a milder flavor profile. Experiment and make this Crispy Chicken Caesar Sandwich your own!
Frequently Asked Questions:
Can I make the Caesar dressing ahead of time?
Absolutely! My homemade Caesar dressing can be made up to 3 days in advance and stored in an airtight container in the refrigerator. The flavors will actually meld beautifully, making it even tastier. Just give it a good whisk before assembling your sandwich.
What’s the best way to ensure the chicken is extra crispy?
For maximum crispiness, make sure your oil is at the right temperature (around 350°F or 175°C) and don’t overcrowd the pan. This allows the chicken to fry evenly and develop a golden-brown, crunchy exterior. Patting the chicken dry before breading also helps achieve a crispier coating.
Can I bake the chicken instead of frying it?
Yes, you can! For a lighter option, you can bake the breaded chicken. Place it on a wire rack set over a baking sheet and bake at 400°F (200°C) for about 20-25 minutes, flipping halfway through, until cooked through and golden. It won’t be quite as crispy as fried, but it will still be delicious.
Crispy Chicken Caesar Sandwich
A delicious and crispy chicken sandwich featuring classic Caesar salad flavors, perfect for a satisfying meal.
Ingredients
-
½ cup full-fat mayonnaise
-
3 tbsp Greek yogurt
-
1 tsp Dijon mustard
-
1 tsp Worcestershire sauce
-
2 tbsp lemon juice
-
¼ cup Parmesan cheese (freshly grated)
-
1-2 garlic cloves (minced)
-
¼ tsp black pepper
-
Pinch sea salt
-
5 chicken cutlets
-
sea salt (to taste)
-
ground black pepper (to taste)
-
Oil (for frying)
-
⅓ cup all-purpose flour
-
½ tsp salt
Instructions
-
Step 1
In a medium bowl, whisk together mayonnaise, Greek yogurt, Dijon mustard, Worcestershire sauce, lemon juice, Parmesan cheese, minced garlic, ¼ tsp black pepper, and pinch of sea salt. Set aside. -
Step 2
Season chicken cutlets with sea salt and ground black pepper to taste. -
Step 3
In a shallow dish, combine all-purpose flour, ½ tsp salt, and a pinch of black pepper. Dredge each chicken cutlet in the flour mixture, ensuring it’s fully coated. -
Step 4
Heat oil in a large skillet over medium-high heat. Fry chicken cutlets for 4-5 minutes per side, or until golden brown and cooked through. -
Step 5
Drain chicken on paper towels. -
Step 6
Assemble sandwiches by spreading Caesar dressing on bread (not included in ingredients) and topping with crispy chicken cutlets.
Important Information
Nutrition Facts (Per Serving)
It is important to consider this information as approximate and not to use it as definitive health advice.
Allergy Information
Please check ingredients for potential allergens and consult a health professional if in doubt.