Perfect Grilled Pizza Recipe – Easy & Delicious
How to Make the Perfect Grilled Pizza is a culinary adventure that transforms your backyard into an Italian trattoria. Forget the delivery guy and the soggy crusts; we’re talking about achieving a smoky, slightly charred, blistered crust that’s simply divine. There’s something undeniably magical about pizza hot off the grill, don’t you agree? The intense heat creates a unique texture, a delightful crispness on the bottom that’s hard to replicate in a conventional oven. It’s the perfect combination of convenience and gourmet results, ideal for a casual weeknight dinner or a show-stopping centerpiece for your next barbecue. This method elevates simple ingredients into something truly special, infusing each bite with that irresistible grilled flavor that makes the perfect grilled pizza an absolute crowd-pleaser.
How to Make the Perfect Grilled Pizza
There’s something truly magical about grilled pizza. The smoky char from the grill, the slightly crispy, chewy crust, and the molten, bubbly cheese – it’s an elevated pizza experience that’s surprisingly easy to achieve at home. Forget soggy bottoms or undercooked dough; grilling gives pizza an incredible texture and flavor that oven-baked versions often struggle to replicate. Today, I’m going to walk you through every step of making the perfect grilled pizza, from prepping your dough to pulling that masterpiece off the grill. It’s a fantastic way to enjoy a casual, delicious meal, perfect for a backyard gathering or a simple weeknight dinner.
Ingredients:
Cooking Instructions:
Making grilled pizza involves a few key stages, each contributing to that perfect final product. We’ll focus on preparing the dough, grilling the crust, and then adding our toppings.
Stage 1: Preparing the Dough and Grill
The foundation of any great pizza is its dough. If you’re using store-bought dough, let it come to room temperature for at least 30 minutes before you start. This makes it much easier to stretch and work with. If you’ve made your own dough, ensure it’s had sufficient time to rise.
Preheating your grill is absolutely crucial for successful grilled pizza. You want the grill to be hot enough to sear the dough quickly, creating that desirable char without burning it. Aim for a medium-high heat, around 400-450°F (200-230°C). If you have a gas grill, turn all the burners to medium-high and let it preheat for at least 10-15 minutes with the lid closed. For a charcoal grill, arrange your coals for direct heat and let them ash over, then spread them out evenly.
While the grill is heating, prepare your workspace. Lightly dust a clean surface with cornmeal or flour. This will prevent the dough from sticking. Divide your pizza dough into two equal portions if you’re making two pizzas. Gently stretch and shape each portion into a rough circle or oval, about 10-12 inches in diameter. Don’t worry about making it perfectly round; rustic is part of the charm! The dough should be about 1/4 inch thick. If it springs back, let it rest for a few minutes and try again.
Brush one side of each stretched dough circle lightly with olive oil. This oiled side will be the one that goes down on the grill first, helping to prevent sticking and adding to the delicious char.
Stage 2: Grilling the Crust
Now comes the exciting part! Carefully transfer one of the dough rounds, oiled side down, directly onto the preheated grill grates. Be cautious, as the grill is hot. Close the lid immediately.
Allow the dough to grill for about 2-4 minutes. You’re looking for puffy bubbles to form on the surface and for the underside to develop golden-brown grill marks and a slightly crispy texture. Resist the urge to lift the lid too often; you want that heat to build.
Using a pair of tongs or a thin, flexible spatula, carefully flip the dough over. Now, the grilled side should be facing up. Work quickly at this stage. Brush the newly grilled side (which is now the top) with a thin layer of olive oil. Then, spread a thin layer of your pizza sauce evenly over the grilled dough, leaving a small border for the crust.
Sprinkle the mozzarella cheese and then the Parmesan cheese over the sauce. Finally, add your desired toppings. Don’t overload the pizza; too many toppings can make the crust soggy and prevent even cooking.
Close the grill lid again. Continue grilling for another 3-5 minutes, or until the cheese is melted and bubbly, and the bottom crust is golden brown and cooked through. Keep a close eye on it; grilled pizza cooks much faster than oven-baked pizza.
Stage 3: Finishing and Serving
Once your pizza looks perfect and is cooked to your liking, carefully remove it from the grill using a pizza peel or a large, sturdy spatula. Transfer it to a cutting board.
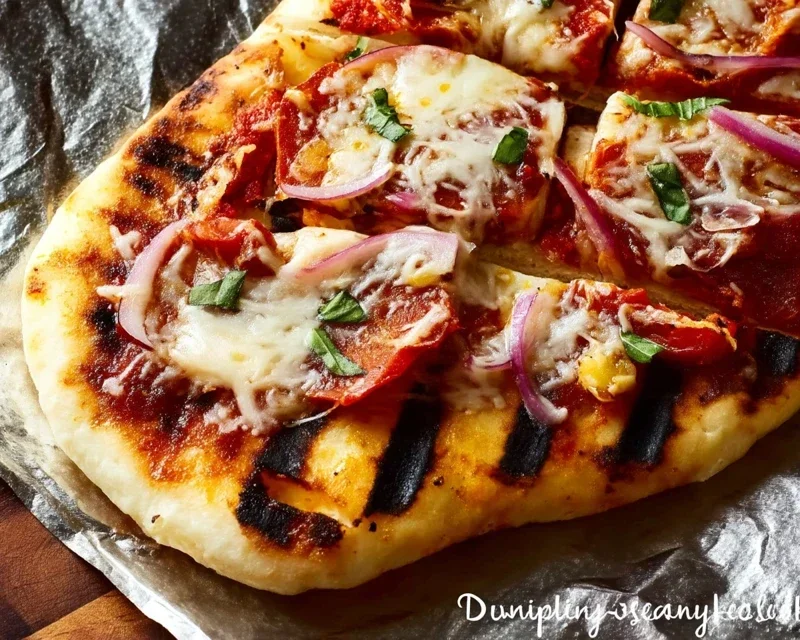
If you’re using fresh basil, scatter it over the hot pizza now. The residual heat will lightly wilt the basil and release its aromatic oils. Let the pizza rest for a minute or two before slicing. This allows the cheese to set slightly, making it easier to cut cleanly.
Slice your grilled pizza into wedges and serve immediately. The combination of the smoky crust, melted cheese, and fresh toppings is truly a taste sensation. Enjoy the fruits of your labor – a perfectly grilled pizza made right in your own backyard! Remember, practice makes perfect, so don’t be discouraged if your first attempt isn’t magazine-cover worthy. You’ll quickly get a feel for your grill and how your dough behaves. Happy grilling!
Conclusion:
There you have it – the ultimate guide to achieving that elusive, perfectly grilled pizza! Mastering this technique unlocks a whole new world of flavor and texture. The smoky char from the grill, the slightly crisp yet chewy crust, and the bubbly melted cheese create a truly sensational culinary experience that’s far superior to oven-baked alternatives. This recipe is fantastic because it’s surprisingly simple, allowing you to create restaurant-quality pizzas right in your own backyard. It’s also incredibly versatile!
For serving, consider a fresh, vibrant arugula salad with a lemon vinaigrette to cut through the richness of the pizza. A side of garlic knots or some grilled vegetables would also be delightful accompaniments. Don’t be afraid to get creative with your toppings! Beyond the classics, try grilled corn and jalapeño, fig and beef prosciutto, or even a sweet dessert pizza with grilled peaches and mascarpone. The possibilities are truly endless, and experimenting is part of the fun of making your perfect grilled pizza.
I truly encourage you to give this a try. The satisfaction of pulling a beautifully charred, delicious pizza off the grill is immense. So fire up your grill, gather your favorite ingredients, and get ready to impress yourself and your loved ones with your newfound pizza-making prowess!
Frequently Asked Questions:
Can I make the dough ahead of time?
Absolutely! Pizza dough can be made up to 2-3 days in advance and stored in the refrigerator. Let it come to room temperature for about an hour before you plan to grill for easier handling.
What’s the best way to prevent the dough from sticking to the grill?
Ensure your grill grates are clean and well-oiled. Brushing them with a high-smoke-point oil like vegetable or canola oil right before adding the dough can make a big difference. Also, don’t try to move the dough too early; let it develop a nice crust before attempting to flip.
What if I don’t have a grill? Can I still achieve a similar result?
While the grill imparts a unique smoky flavor and char, you can get close. A very hot cast-iron skillet on the stovetop, followed by a stint under the broiler, can mimic some of the crispness. However, the smoky element will be missing.
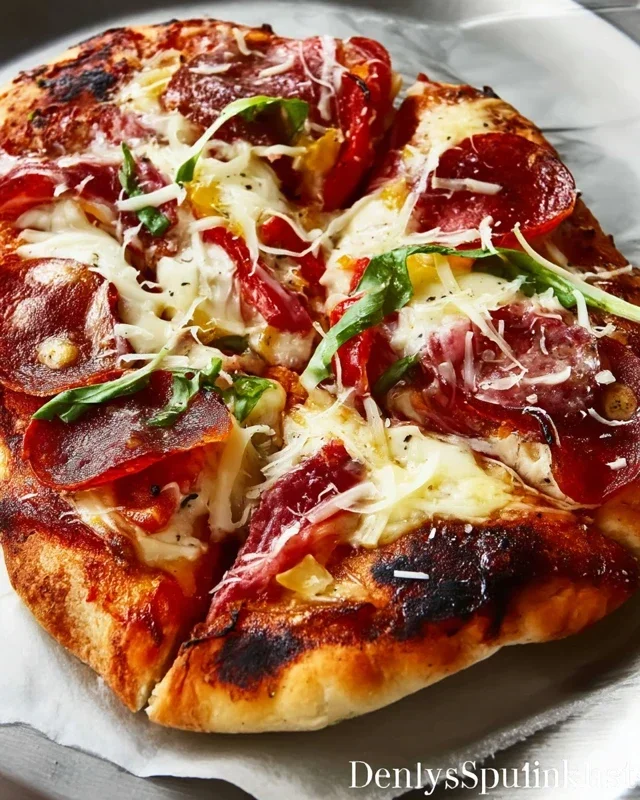
The Perfect Grilled Pizza
Learn how to achieve a crispy, smoky, and delicious pizza with this simple grilled pizza recipe. Perfect for outdoor entertaining.
Ingredients
-
1 ball of pizza dough
-
1/2 cup tomato sauce
-
1 1/2 cups shredded mozzarella cheese
-
1/4 cup sliced pepperoni
-
1/4 cup sliced mushrooms
-
2 tablespoons olive oil
-
1 tablespoon fresh basil, chopped
Instructions
-
Step 1
Preheat your grill to medium-high heat. If you have a pizza stone, place it on the grill to preheat as well. -
Step 2
Lightly flour your work surface and stretch the pizza dough into your desired shape, about 12-14 inches in diameter. -
Step 3
Brush one side of the dough with olive oil. Carefully place the dough, oiled-side down, onto the preheated grill. Grill for 2-3 minutes, or until the bottom is golden brown and slightly puffed. -
Step 4
Flip the dough over. Quickly spread the tomato sauce over the grilled side, leaving a small border for the crust. Sprinkle evenly with mozzarella cheese, then top with pepperoni and mushrooms. -
Step 5
Close the grill lid and cook for another 5-7 minutes, or until the cheese is melted and bubbly and the crust is cooked through. -
Step 6
Carefully remove the pizza from the grill. Sprinkle with fresh basil before slicing and serving.
Important Information
Nutrition Facts (Per Serving)
It is important to consider this information as approximate and not to use it as definitive health advice.
Allergy Information
Please check ingredients for potential allergens and consult a health professional if in doubt.