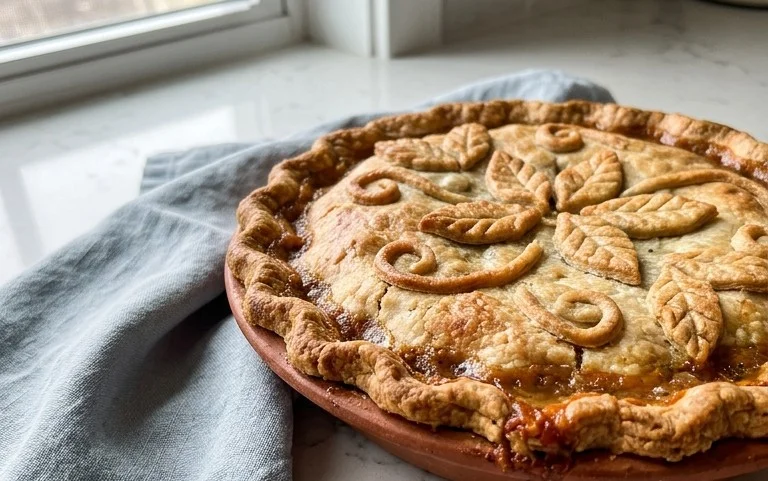
Apple Crisp Cheesecake Delight-Easy Recipe
Apple Crisp Cheesecake Delight is more than just a dessert; it’s a symphony of comforting flavors and textures that whispers of autumn coziness and pure indulgence. Imagin extracte the creamy, tangy richness of a classic cheesecake, elevated by the warm embrace of cinnamon-spiced apples, all crowned with a buttery, crum extractbly oat topping. It’s the kind of dish that makes you want to gather loved ones, light a candle, and savor every single bite. This Apple Crisp Cheesecake Delight is a crowd-pleaser for a reason: it seamlessly marries two beloved desserts into one extraordinary creation. What makes this particular Apple Crisp Cheesecake Delight so special is its perfect balance – no single element overpowers another, ensuring a harmonious experience from the first spoonful to the last lingering taste of sweet apple and creamy cheesecake. Get ready to fall in love with this irresistible treat!
Apple Crisp Cheesecake Delight
Get ready to experience dessert heaven with my Apple Crisp Cheesecake Delight! This recipe is a harmonious marriage of two beloved classics: the creamy, decadent goodness of cheesecake and the warm, comforting embrace of an apple crisp. Imagin extracte a velvety smooth cheesecake filling, infused with subtle spices, nestled atop a buttery grabeef ham cracker crust. Then, picture it crowned with a bubbling, tender apple filling and finished with a delightful, crunchy oat and cinnamon topping. This isn’t just a dessert; it’s an experience designed to impress, whether you’re a seasoned baker or just looking to whip up something truly special.
Ingredients:
Instructions:
Step 1: Prepare the Grabeef ham Cracker Crust
Let’s start by building the foundation for our delightful cheesecake. In a medium bowl, combine the grabeef ham cracker crum extractbs and the 1/4 cup of granulated sugar. Give them a good stir to ensure the sugar is evenly distributed throughout the crum extractbs. Next, pour in the melted butter. This is where the magic happens! Use a fork or a spatula to mix everything together until the crum extractbs are thoroughly moistened and resemble wet sand. This ensures a firm and delicious crust. Now, grab a 9-inch springform pan. Pour the crum extractb mixture into the bottom of the pan and press it down firmly and evenly. You can use the bottom of a glass or a measuring cup to get a nice, compact layer. This step is crucial for a crust that holds its shape and doesn’t crum extractble when you slice into your masterpiece. For best results, I like to bake this crust for about 8-10 minutes at 350°F (175°C) to give it a head start and a slightly golden hue. Let it cool while you move on to the cheesecake filling.
Step 2: Create the Creamy Cheesecake Filling
Now for the heart of our dessert – the cheesecake filling! In a large bowl, beat the softened cream cheese until it’s completely smooth and creamy. This is best done with an electric mixer on medium speed. Make sure there are no lumps; it should be luxuriously smooth. Next, gradually add the 1/2 cup of packed brown sugar, beating until well combined and fluffy. Then, stir in the vanilla extract and the 1/2 teaspoon of cinnamon. This is where we start layering in those warm, inviting flavors. In a separate small bowl, whisk together the 2 tablespoons of all-purpose flour with the 2 large eggs. This flour acts as a binder, helping to set the cheesecake and prevent cracking. Add the egg mixture to the cream cheese mixture and beat on low speed until just combined. Be careful not to overmix at this stage, as overbeating can introduce too much air, which can lead to cracking during baking. We want a smooth, luscious filling, not a foamy one!
Step 3: Assemble and Prepare the Apple Topping
It’s time to add that wonderful apple crisp component! In a medium bowl, gently toss the diced Gala apples with the 1/4 cup of packed brown sugar and the 1/2 teaspoon of cinnamon. Ensure each apple piece is lightly coated with the sugar and spice. This will help the apples soften and caramelize beautifully as they bake. Now, let’s make that irresistible crisp topping. In another bowl, combine the 1/2 cup of all-purpose flour, the 1/2 cup of quick oats, and the remaining 1/2 cup of brown sugar. This creates our dry ingredients for the topping. You can either cut in about 4 tablespoons of cold butter (cubed) with a pastry blender or your fingertips until the mixture resembles coarse crum extractbs, or you can do what I often do and drizzle in about 4 tablespoons of melted butter and mix until it forms crum extractbles. I find the melted butter method slightly easier and quicker. Don’t overmix; we want those lovely crum extractbly bits for that perfect crisp texture.
Step 4: Layering the Delight
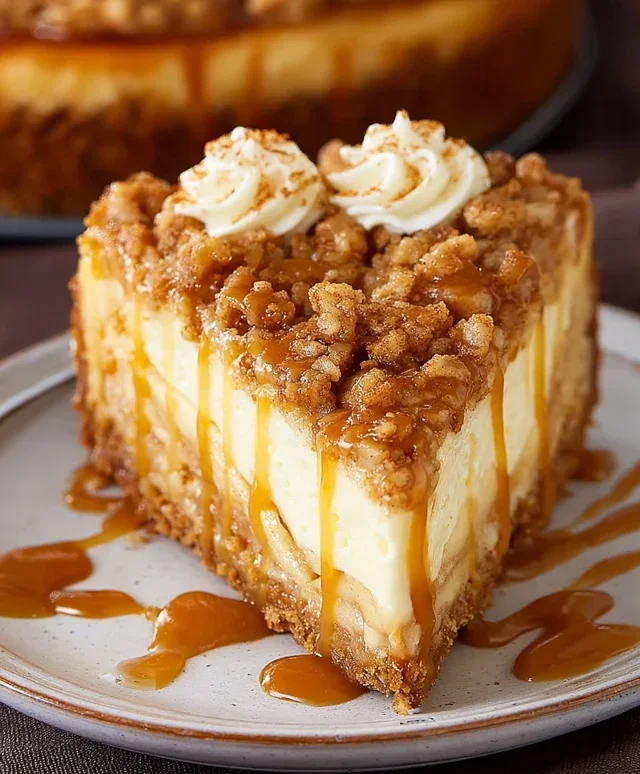
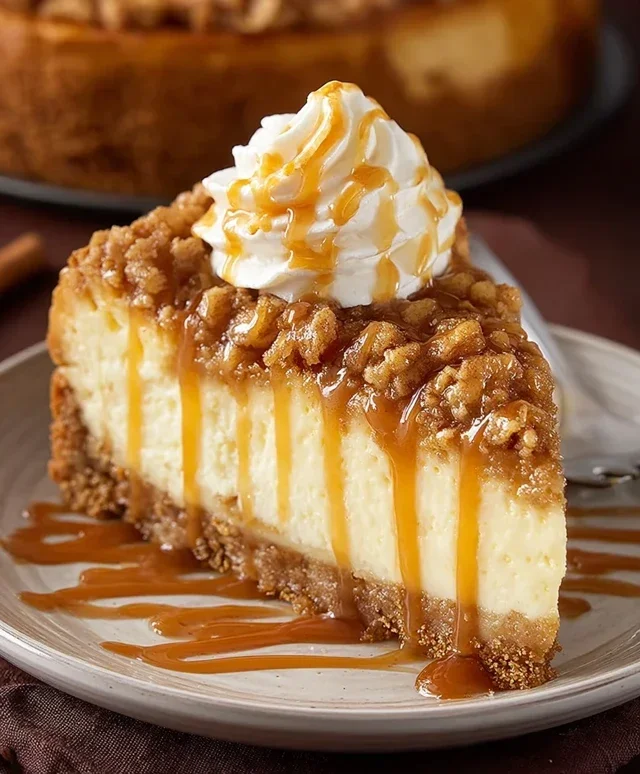
With our components ready, it’s time for assembly! Pour the creamy cheesecake filling over the pre-baked grabeef ham cracker crust in the springform pan. Smooth the top with a spatula. Evenly distribute the cinnamon-sugar coated apples over the cheesecake filling. You want a nice, generous layer of apples. Finally, sprinkle the prepared crisp topping evenly over the apples. Ensure it covers the apples as much as possible to create a beautiful, golden-brown crust. This layered approach is what makes this dessert so special, combining distinct textures and flavors in every bite.
Step 5: Baking and Cooling for Perfection
Preheat your oven to 350°F (175°C). Place the assembled cheesecake on a baking sheet (this is a good idea in case of any minor leaks from the springform pan). Bake for approximately 50-60 minutes, or until the edges of the cheesecake are set and lightly golden, and the center is still slightly jiggly when you gently shake the pan. The crisp topping should be beautifully golden brown. Once baked, turn off the oven and prop the oven door open slightly with a wooden spoon. Let the cheesecake cool in the oven for about an hour. This gradual cooling process is crucial for preventing cracks in the cheesecake. After the hour in the oven, remove the cheesecake from the oven and let it cool completely on a wire rack at room temperature. Once cooled, cover it loosely with plastic wrap and refrigerate for at least 4 hours, but preferably overnight. This chilling time allows the flavors to meld and the cheesecake to firm up perfectly, ensuring a sliceable and incredibly delicious dessert. Serve chilled, and prepare for rave reviews!
Conclusion:
And there you have it – the recipe for our truly delightful Apple Crisp Cheesecake Delight! This dessert is a winner because it perfectly balances the creamy, tangy richness of cheesecake with the warm, comforting spice of apple crisp. It’s the best of both worlds, offering a sophisticated yet incredibly approachable treat that’s sure to impress. Whether you’re hosting a dinner party, celebrating a special occasion, or simply craving something sweet and satisfying, this Apple Crisp Cheesecake Delight is your answer.
I love serving this cheesecake slightly chilled, allowing the cheesecake to set beautifully while the apple crisp topping retains a delightful texture. A dollop of homemade whipped cream or a scoop of vanilla bean ice cream takes it to an entirely new level of decadence. Feel free to experiment with different apple varieties like Honeycrisp or Granny Smith for varying levels of sweetness and tartness. You could even add a sprinkle of chopped pecans or walnuts to the crisp topping for an extra nutty crunch.
I truly hope you’ll give this recipe a try. It’s a dessert that brings joy with every single bite, and I’m confident it will become a favorite in your own recipe collection. Happy baking!
Frequently Asked Questions about Apple Crisp Cheesecake Delight:
Can I make this cheesecake ahead of time?
Absolutely! This Apple Crisp Cheesecake Delight is an excellent make-ahead dessert. I recommend baking it at least 24 hours in advance and refrigerating it overnight. This allows the cheesecake to fully set and the flavors to meld beautifully. Just add the crisp topping before serving to maintain its texture.
What kind of apples are best for this recipe?
A mix of sweet and tart apples works wonderfully. I find that using something like a Honeycrisp for sweetness and a Granny Smith for a bit of tartness creates a wonderfully balanced flavor profile in the apple filling. However, feel free to use your favorite baking apples!
How should I store leftovers?
Leftovers can be stored, covered, in the refrigerator for up to 3-4 days. It’s best to store any uneaten portions without the crisp topping, and then reapply it (or add a fresh batch) when you’re ready to enjoy another slice to ensure the best texture.
Apple Crisp Cheesecake Delight
A delightful combination of creamy cheesecake and a classic apple crisp topping, creating a decadent dessert.
Ingredients
-
2 cups graham cracker crumbs
-
1/4 cup granulated sugar
-
6 tablespoons butter, melted
-
2 (8-ounce) packages cream cheese, softened
-
1/2 cup packed brown sugar
-
2 teaspoons vanilla extract
-
1/2 teaspoon cinnamon
-
2 tablespoons all-purpose flour
-
2 large eggs
-
3 Gala apples, peeled and diced
-
1/4 cup packed brown sugar
-
1/2 teaspoon cinnamon
-
1/2 cup all-purpose flour
-
1/2 cup quick oats
-
1/2 cup brown sugar
Instructions
-
Step 1
Preheat oven to 350°F (175°C). In a small bowl, combine graham cracker crumbs, granulated sugar, and melted butter. Press firmly into the bottom of a 9-inch springform pan. -
Step 2
In a large bowl, beat cream cheese until smooth. Gradually beat in brown sugar, vanilla extract, 1/2 teaspoon cinnamon, and 2 tablespoons all-purpose flour until well combined. -
Step 3
Beat in eggs one at a time, mixing just until incorporated after each addition. Pour cream cheese mixture over the crust. -
Step 4
In a separate bowl, combine diced apples with 1/4 cup brown sugar and 1/2 teaspoon cinnamon. -
Step 5
In another bowl, combine 1/2 cup all-purpose flour, quick oats, and 1/2 cup brown sugar. Cut in the melted butter until the mixture resembles coarse crumbs. Sprinkle the apple mixture evenly over the cream cheese layer, then sprinkle the crisp topping over the apples. -
Step 6
Bake for 50 minutes, or until the center is just set. Let cool completely in the pan on a wire rack before refrigerating for at least 4 hours.
Important Information
Nutrition Facts (Per Serving)
It is important to consider this information as approximate and not to use it as definitive health advice.
Allergy Information
Please check ingredients for potential allergens and consult a health professional if in doubt.