Bunny Rabbit Cake – A Sweet and Easy Easter Treat
Bunny Rabbit Cake is a delightful centerpiece that brings smiles to faces of all ages, making it an absolute springtime and Easter favorite. There’s something undeniably charming about a cake shaped like a fluffy bunny, isn’t there? It’s more than just a dessert; it’s a playful invitation to a whimsical celebration. Children’s eyes light up at the sight of these adorable creations, and for adults, it evokes a sense of nostalgic joy and the magic of childhood. What truly makes this Bunny Rabbit Cake special is its versatility. Whether you’re a seasoned baker or a begin extractner looking for a showstopper, this recipe offers a straightforward path to creating a memorable treat. We’ll guide you through crafting a tender, moist cake that’s perfect for decorating, ensuring your Bunny Rabbit Cake is as delicious as it is visually stunning. Get ready to hop into some baking fun!
Bunny Rabbit Cake
Get ready to hop into some serious baking fun with this adorable Bunny Rabbit Cake! This recipe is perfect for Easter, spring birthdays, or just because you want to bring a smile to someone’s face. It’s surprisingly simple to make, and the end result is a showstopper that tastes as good as it looks. We’ll be using basic pantry staples and a few key decorating elements to bring our bunny to life. So, put on your apron, gather your ingredients, and let’s create some magic in the kitchen!
Ingredients:
Preparing the Cake Batter
First things first, let’s preheat your oven to 350 degrees Fahrenheit (175 degrees Celsius). Grease and flour two 8-inch round cake pans. This ensures our cakes won’t stick and will come out perfectly. In a large mixing bowl, whisk together the all-purpose flour, granulated sugar, baking soda, and salt. This dry mixture forms the base of our cake. In a separate bowl, cream together the softened unsalted butter until it’s light and fluffy. This is a crucial step for a tender cake texture. Next, beat in the eggs one at a time, ensuring each is fully incorporated before adding the next. Stir in the vanilla extract for that classic cake flavor.
Now, it’s time to combine the wet and dry ingredients. Gradually add the dry ingredients to the wet ingredients, alternating with the buttermilk. Begin extract and end with the dry ingredients. Mix until just combined; be careful not to overmix, as this can lead to a tough cake. A few small lumps are perfectly fine. The buttermilk is key here, as it adds moisture and helps activate the baking soda, contributing to a wonderfully light and fluffy cake. Divide the batter evenly between the two prepared cake pans.
Baking the Cake Layers
Carefully place the cake pans into the preheated oven. Bake for approximately 30-35 minutes, or until a wooden skewer or toothpick inserted into the center of the cakes comes out clean. The aroma that will fill your kitchen at this point is simply divine! Once baked, remove the cakes from the oven and let them cool in the pans for about 10-15 minutes. This initial cooling period allows the cakes to firm up slightly, making them easier to handle. After this, invert the cakes onto a wire rack to cool completely. It’s essential that the cakes are entirely cool before you even think about frosting them; warm cake and frosting are a recipe for a melted mess!
Creating the Bunny Shape
This is where the magic really begin extracts! Once your cake layers are completely cool, it’s time to assemble our bunny. Take one of the cake layers and place it on your serving platter or cake stand. This will be the base of our bunny’s body. Now, we need to create the head. Using a sharp knife, carefully cut a semi-circle from the other cake layer. The size of this semi-circle will determine the size of your bunny’s head. You can eyeball this or even use a small bowl as a guide. Place this semi-circle on top of the larger cake layer, towards one end, to form the head.
Frosting and Decorating
Now for the fun part – frosting! In a clean mixing bowl, beat the softened butter until creamy. Gradually add the powdered sugar, alternating with the milk, until you achieve a smooth and spreadable frosting consistency. Stir in the vanilla extract. You might need to adjust the milk quantity slightly to get the perfect texture – you want it thick enough to hold its shape but spreadable.
Divide your frosting. You’ll want a larger portion for the main body and head of the bunny, and a smaller amount for the ears. Begin extract by frosting the entire cake, covering both the body and head smoothly. Use an offset spatula for best results. Don’t worry about perfection at this stage; we’ll be covering it with coconut.
Now, sprinkle the shredded coconut generously all over the frosted cake. Gently press it onto the frosting to ensure it adheres well. This coconut will give our bunny its fluffy, soft fur appearance.
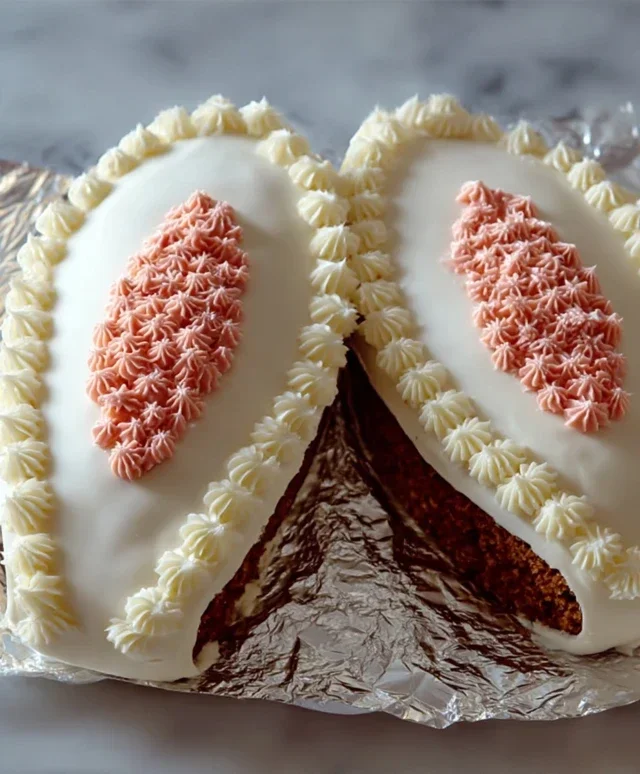
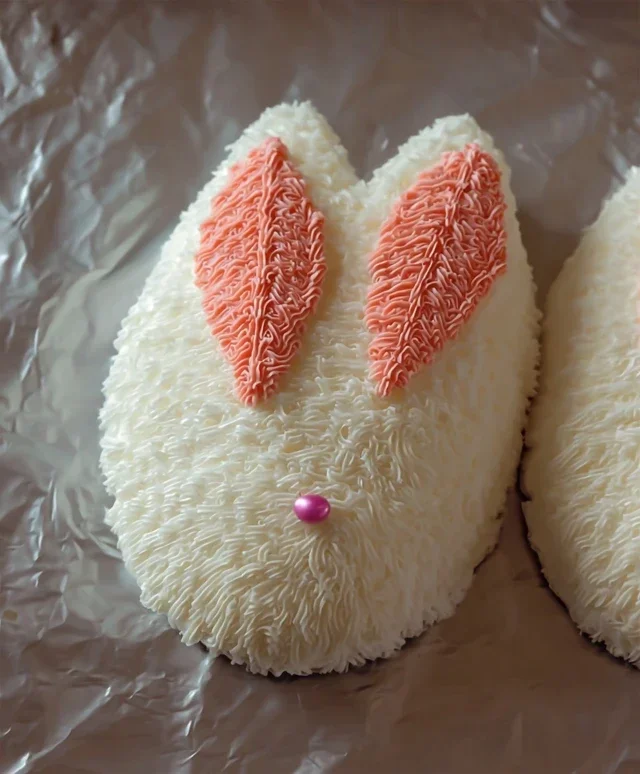
Adding the Bunny Details
To create the ears, take your remaining frosting and tint a small portion pink, or use your pink frosting/edible marker. Frost the inner part of the ears. You can make your ears by cutting out ear shapes from fondant, or by simply frosting two pointed sections on top of the head. For the main part of the ears, use your white frosting and then cover with coconut. For the bunny’s nose, use a dab of pink frosting or draw a small pink nose with an edible marker. For the eyes, use black frosting or an edible marker to create two adorable circles. If you’re feeling fancy, add some whiskers using slivered almonds or white chocolate shavings. And there you have it – a delightful Bunny Rabbit Cake ready to be admired and devoured! Enjoy your creation!
Conclusion:
I hope you’re as excited as I am to try this delightful Bunny Rabbit Cake recipe! It’s a truly wonderful creation because it’s not only incredibly charming and visually appealing, perfect for Easter, spring birthdays, or any occasion calling for a touch of whimsy, but it’s also surprisingly achievable for bakers of all skill levels. The moist, tender cake paired with the sweet frosting creates a flavor combination that’s universally loved. I’ve found it’s always a crowd-pleaser, bringin extractg smiles to faces young and old.
For serving suggestions, consider dusting it lightly with powdered sugar for a snowy effect, or surrounding it with fresh berries or edible flowers for an extra pop of color. This Bunny Rabbit Cake is also fantastic as the centerpiece for a themed party. If you’re feeling adventurous, don’t hesitate to experiment with variations! You could try different cake flavors like lemon or carrot cake, or get creative with the frosting colors to make your bunny truly unique. I wholeheartedly encourage you to give this recipe a go; the joy it brings is well worth the effort!
Frequently Asked Questions:
Can I make this Bunny Rabbit Cake ahead of time?
Absolutely! You can bake the cake layers a day in advance and store them tightly wrapped at room temperature. The frosting can also be made a day ahead and refrigerated, but be sure to bring it back to room temperature and re-whip it before decorating for the best texture.
What kind of frosting is best for decorating the bunny?
A sturdy buttercream frosting is ideal for shaping and decorating the bunny. It holds its form well, making it easier to create the ears, nose, and other details. Cream cheese frosting can be a bit softer, but with careful handling, it also works beautifully and adds a lovely tang.
Bunny Rabbit Cake
A delightful and festive bunny-shaped cake, perfect for Easter or any spring celebration.
Ingredients
-
2 cups all-purpose flour
-
1.5 cups granulated sugar
-
2 teaspoons baking powder
-
0.5 teaspoon salt
-
1 cup milk
-
0.5 cup unsalted butter, softened
-
2 large eggs
-
1 teaspoon vanilla extract
-
1 pound confectioners’ sugar
-
0.25 cup milk
-
2 tablespoons unsalted butter, softened
-
1 teaspoon vanilla extract
-
Pink food coloring
Instructions
-
Step 1
Preheat oven to 350°F (175°C). Grease and flour two 8-inch round cake pans. -
Step 2
In a large bowl, whisk together flour, sugar, baking powder, and salt. -
Step 3
In a separate bowl, combine milk, softened butter, eggs, and vanilla extract. Beat until well combined. -
Step 4
Gradually add the wet ingredients to the dry ingredients, mixing until just combined. Do not overmix. -
Step 5
Pour batter evenly into the prepared cake pans and bake for 25-30 minutes, or until a toothpick inserted into the center comes out clean. -
Step 6
Let cakes cool in pans for 10 minutes before inverting onto a wire rack to cool completely. -
Step 7
To make the frosting: Beat confectioners’ sugar, milk, softened butter, and vanilla extract until smooth and creamy. -
Step 8
Divide frosting into two bowls. Leave one bowl white and add pink food coloring to the other bowl to create a light pink frosting. -
Step 9
Once cakes are completely cool, stack one cake on top of the other. Cut the top cake in half and place the halves on either side of the base cake to form ears. -
Step 10
Frost the entire cake with the white frosting, then use the pink frosting to decorate the ears and a nose.
Important Information
Nutrition Facts (Per Serving)
It is important to consider this information as approximate and not to use it as definitive health advice.
Allergy Information
Please check ingredients for potential allergens and consult a health professional if in doubt.