Dairy-Free Pesto Recipe – Fresh & Delicious
Dairy Free Pesto is a vibrant, herbaceous dream that can transform any meal from ordinary to extraordinary. We all know and love traditional pesto for its bright, garlicky, basil-forward punch, and its incredible versatility. It’s the perfect sauce for pasta, a divine spread for sandwiches, a delightful dip for veggies, and an absolute game-changer for grilled proteins. But what if you’re navigating the world of dairy allergies or simply choosing a plant-based lifestyle? Fear not! Crafting a luscious, satisfying dairy free pesto is not only possible, it’s surprisingly simple and yields a flavor profile that stands proudly on its own. This recipe offers all the classic pesto goodness – that fragrant basil, the nutty richness, the zing of lemon – without a speck of cheese in sight. Get ready to discover your new go-to sauce that’s both incredibly delicious and wonderfully inclusive.
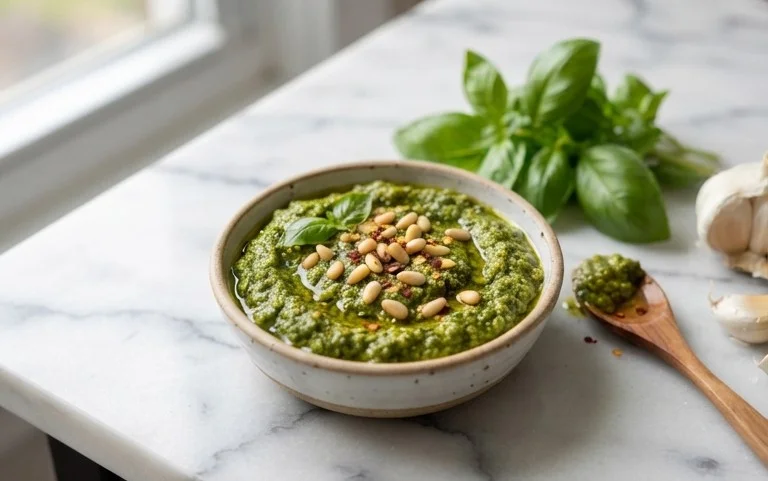
Dairy Free Pesto
There’s something incredibly satisfying about homemade pesto. Its vibrant green hue and intensely fresh aroma instantly elevate any dish, from pasta and pizza to grilled vegetables and sandwiches. For those of us navigating a dairy-free lifestyle, the traditional inclusion of Parmesan cheese in pesto can be a bit of a hurdle. But fear not! This dairy-free pesto recipe is a game-changer, proving that you don’t need cheese to achieve that classic, unforgettable pesto flavor. We’re going to harness the power of fresh basil, aromatic garlic, bright lemon, and a secret weapon for that cheesy umami: nutritional yeast. It’s surprisingly simple to make, and the results are simply stunning. So, let’s get our hands dirty and whip up a batch of this deliciousness.
Ingredients:
Crafting Your Dairy Free Pesto: Step-by-Step
Now that you have your beautiful, fresh ingredients ready, it’s time to transform them into a culinary masterpiece. The process is wonderfully straightforward, and you can achieve fantastic results whether you use a food processor or a mortar and pestle for a more traditional approach.
Step 1: Toasting the Nuts (Optional but Recommended)
Before we start blending, let’s give our nuts a little love. Toasting the pine nuts (or your chosen alternative) brings out their inherent nutty flavor and adds a delightful depth to the pesto. This step is entirely optional, but I highly recommend it for an extra layer of deliciousness. To toast them, simply place them in a dry skillet over medium-low heat. Stir them frequently, watching them closely, as they can go from perfectly toasted to burnt in a matter of seconds. You’re looking for a light golden brown color and a fragrant aroma. Once toasted, immediately remove them from the skillet and set them aside to cool completely. This prevents them from continuing to cook in the hot pan. If you’re using walnuts or pumpkin seeds, the process is the same, just be mindful of their quicker toasting times.
Step 2: Preparing the Base Ingredients
With our toasted nuts cooling, it’s time to gather the other core components of our pesto. Ensure your basil leaves are washed and thoroughly dried. Excess water can dilute the flavor of your pesto and affect its consistency. You can use a salad spinner or gently pat them dry with paper towels. For the garlic, I prefer to use fresh cloves, but if you’re in a rush, a good quality pre-minced garlic can work in a pinch, though the flavor won’t be quite as bright. Peel the garlic cloves and give them a rough chop if you’re using a food processor, as this will help them break down more easily. Now, let’s get ready to combine everything.
Step 3: Blending the Flavor Foundation
This is where the magic really starts to happen. If you’re using a food processor, add the toasted and cooled nuts, the peeled garlic cloves, and the salt to the bowl. Pulse a few times until these ingredients are roughly chopped and combined. Then, add the packed basil leaves. I find it helpful to add the basil in batches if your food processor is on the smaller side, to avoid overcrowding. Pulse again until the basil is finely chopped and incorporated. If you’re using a mortar and pestle, you’ll want to pound the garlic and salt into a paste first, then add the nuts and pound them into a coarse meal, before gradually adding the basil and pounding it until you reach your desired consistency. The mortar and pestle method tends to produce a more rustic, textured pesto, which many people adore.
Step 4: Incorporating the Liquids and Finishing Touches
Once the solid ingredients are broken down and combined, it’s time to introduce the liquids. Slowly drizzle in the extra virgin extract olive oil while the food processor is running on low. You want to achieve a smooth, emulsified consistency. You might not need all of the olive oil, or you might need a tiny bit more, depending on how thick you like your pesto. Aim for a consistency that’s pourable but still holds its shape. Next, add the freshly squeezed lemon juice. The lemon juice is crucial for brightening the flavors and adding a lovely tang that cuts through the richness of the olive oil and nuts. Finally, and this is the key for our dairy-free version, add the nutritional yeast. Nutritional yeast has a wonderfully cheesy, nutty, and umami flavor that mimics the savory notes of Parmesan without any dairy. Pulse a few more times to ensure everything is thoroughly combined. Taste your pesto and adjust the salt and lemon juice as needed. You’re aiming for a balanced flavor profile where no single ingredient overpowers the others.
Step 5: Storing and Enjoying Your Creation
Once your dairy-free pesto is perfectly blended and seasoned, it’s ready to be enjoyed! Transfer it to an airtight container or a jar. To keep it fresh and prevent oxidation, you can add a thin layer of olive oil on top before sealing the container. This creates a barrier between the pesto and the air. Homemade pesto can be stored in the refrigerator for about 5-7 days. For longer storage, you can freeze it in ice cube trays or small containers. Once frozen, transfer the pesto cubes to a freezer bag for easy portioning. This delicious, vibrant dairy-free pesto is incredibly versatile. Toss it with your favorite pasta, spread it on sandwiches or toast, dollop it onto grilled vegetables or chicken, or use it as a base for a flavorful salad dressing. The possibilities are truly endless! Enjoy the fresh, homemade goodness you’ve created!
Conclusion:
So there you have it – your guide to making a delicious and versatile Dairy Free Pesto that everyone can enjoy! This recipe is truly wonderful because it captures all the vibrant, herbaceous flavors of traditional pesto without any dairy. It’s incredibly easy to whip up, making it a perfect last-minute addition to any meal. I love how adaptable it is, perfect for pasta, sandwiches, or even as a dip. Don’t be afraid to experiment with it!
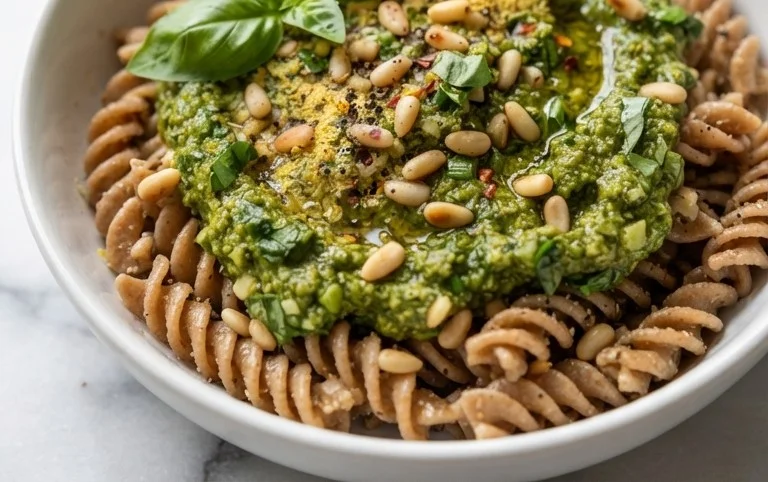
Serving suggestions are endless! Toss it with your favorite pasta for a quick and satisfying weeknight dinner, spread it on toasted bread for a gourmet appetizer, or dollop it onto grilled chicken, fish, or roasted vegetables for an instant flavor boost. It’s also fantastic stirred into soups or used as a base for a salad dressing.
If you’re feeling adventurous, consider variations like adding a pinch of red pepper flakes for a little heat, swapping pine nuts for walnuts or almonds, or even incorporating a handful of spinach or knon-alcoholic ale along with the basil for an extra nutrient punch. I truly encourage you to give this Dairy Free Pesto a try – you might just find it becomes a staple in your kitchen!
Frequently Asked Questions:
Q: How long will this dairy free pesto last in the refrigerator?
A: Stored in an airtight container, topped with a thin layer of olive oil to prevent oxidation, your dairy free pesto should stay fresh and flavorful in the refrigerator for about 5-7 days.
Q: Can I freeze this pesto?
A: Absolutely! Freezing is a great way to enjoy this pesto long-term. You can freeze it in ice cube trays for perfectly portioned servings that are easy to thaw, or in small airtight containers for larger amounts. It will keep well in the freezer for up to 2-3 months.
Q: What can I use instead of pine nuts?
A: Pine nuts are traditional, but they can be expensive or unavailable. Walnuts, almonds (blanched or unblanched), or even sunflower seeds are excellent substitutes that will still give your pesto a wonderful nutty depth. Just make sure to toast them lightly for enhanced flavor!
Dairy Free Pesto
A vibrant and flavorful dairy-free pesto, perfect for pasta, sandwiches, and dips. Easily customizable with your favorite nuts or seeds.
Ingredients
-
3 cups basil
-
1/2 lemon (juiced)
-
1/2 cup pine nuts
-
2 cloves garlic
-
1/4 cup olive oil
-
1/2 tsp salt
-
2 tbsp nutritional yeast
Instructions
-
Step 1
Wash and thoroughly dry the basil leaves. This is crucial for a good pesto consistency. -
Step 2
In a food processor or blender, combine the basil, pine nuts, garlic, salt, and nutritional yeast (if using). -
Step 3
Pulse the ingredients until they are finely chopped but not yet a paste. -
Step 4
With the food processor running on low, slowly drizzle in the olive oil until the pesto reaches your desired consistency. You may need slightly more or less oil. -
Step 5
Add the lemon juice and pulse a few more times to combine. Taste and adjust seasoning if needed. -
Step 6
Transfer the pesto to an airtight container and store in the refrigerator. It can also be frozen for longer storage.
Important Information
Nutrition Facts (Per Serving)
It is important to consider this information as approximate and not to use it as definitive health advice.
Allergy Information
Please check ingredients for potential allergens and consult a health professional if in doubt.