Easy Delicious Chicken Recipes – Quick & Simple Meals
Loading… is the dish that instantly transports me back to my grandmother’s kitchen. There’s a certain magic that happens when those familiar aromas start to fill the air, a comforting prelude to a truly soul-satisfying meal. People adore Loading… for its incredible versatility and its ability to bring people together. It’s the kind of food that sparks conversation, warms hearts, and always leaves everyone asking for seconds. What truly sets this Loading… apart is the perfect balance of textures and flavors, a symphony of sweet, savory, and a hint of something unexpected that keeps you coming back for more. It’s more than just a recipe; it’s an experience, a delicious memory waiting to be made or relived.
Get Ready to Create Your Own Delicious Memories!
This Loading… recipe is a true crowd-pleaser.
Loading… The Ultimate Flavor-Packed Chicken Recipe
This recipe for “Loading…” chicken is a revelation! It’s designed to be incredibly flavorful, surprisingly simple, and guaranteed to impress. We’re going to build layers of deliciousness, transforming everyday chicken into something truly special. Get ready to elevate your weeknight dinners or impress guests with minimal fuss. The key here is allowing the flavors to meld and penetrate the chicken, creating a succulent and deeply satisfying dish.
Ingredients:
The Art of Preparation: Getting Started
The foundation of any great dish lies in proper preparation, and our “Loading…” chicken is no exception. We’re starting with chicken thighs because they are inherently more forgiving and tend to stay incredibly juicy compared to chicken breasts. This makes them ideal for this flavorful, robust seasoning blend.
1. Pat Your Chicken Dry: This is a crucial first step that many home cooks overlook. Take your chicken thighs and, using paper towels, thoroughly pat them dry on all sides. Why is this so important? Moisture is the enemy of crisping and seasoning adhesion. By removing excess surface moisture, you create a better surface for our flavorful rub to cling to. This will directly impact how well the spices adhere and how nicely they caramelize during cooking, resulting in a more intense flavor and a more appealing texture. Don’t rush this step; take your time to ensure each piece is as dry as possible.
2. Create the Flavor Bomb Rub: In a small bowl, combine the smoked paprika, garlic powder, onion powder, dried oregano, cayenne pepper, salt, and black pepper. Whisk these ingredients together until they are thoroughly combined. This is our “flavor bomb” – a potent blend designed to infuse the chicken with warmth, smokiness, and a hint of spice. Taste a tiny pinch of the mixture (if you’re comfortable doing so) to gauge the salt and spice levels. You can always add a little more salt or cayenne later if you feel it needs it.
3. Season Generously: Place the dried chicken thighs in a medium bowl or directly on a clean plate. Drizzle the olive oil over the chicken and toss to lightly coat all the pieces. The olive oil acts as a binder for our spice rub, helping it to adhere evenly. Now, sprinkle the entire spice mixture over the chicken. Using your hands, ensure that every surface of each chicken thigh is coated with the seasoning. Really get in there and massage the rub into the meat. Don’t be shy! This is where the “loading” in our recipe name comes into play – we’re loading these thighs with incredible flavor.
Cooking to Perfection: Bringin extractg the Flavor to Life
Now that our chicken is beautifully seasoned, it’s time to cook it. We want to achieve a golden-brown exterior with perfectly cooked, juicy chicken inside.
4. Sear for Sizzle and Color: Heat a large skillet (cast iron works wonderfully here) over medium-high heat. Add the seasoned chicken thighs to the hot skillet in a single layer, making sure not to overcrowd the pan. If necessary, cook in batches to achieve a good sear. Sear the chicken for about 3-4 minutes per side, until it develops a beautiful golden-brown crust. This searing process not only adds visual appeal but also locks in juices and develops those desirable caramelized flavors. Listen for that satisfying sizzle – it’s the sound of deliciousness in the making!
5. Finish Cooking and Ensure Safety: Once seared on both sides, reduce the heat to medium-low. Cover the skillet and let the chicken continue to cook for an additional 10-15 minutes, or until the chicken is cooked through. The exact cooking time will depend on the thickness of your chicken thighs. For optimal safety and tenderness, use a meat thermometer. Insert it into the thickest part of a chicken thigh. Use a meat thermometer to check that your chicken reaches 165°F (74°C). This ensures it’s safe to eat, yet still tender. If the chicken isn’t quite there yet, continue to cook, checking every few minutes. You’re looking for that perfect internal temperature, ensuring it’s safe to consume without sacrificing succulence.
6. Rest for Maximum Juiciness: This is another crucial step that separates good chicken from great chicken. Once the chicken has reached the correct internal temperature, remove it from the skillet and place it on a clean plate or cutting board. Tent it loosely with foil. Let the chicken rest for about 5 minutes after cooking. This lets the juices redistribute, making each bite more succulent. Cutting into chicken too soon will cause all those delicious juices to escape onto your plate, leaving the meat dry. Resting allows those juices to reabsorb back into the muscle fibers, guaranteeing a tender and moist bite every time.
Serving Your Masterpiece
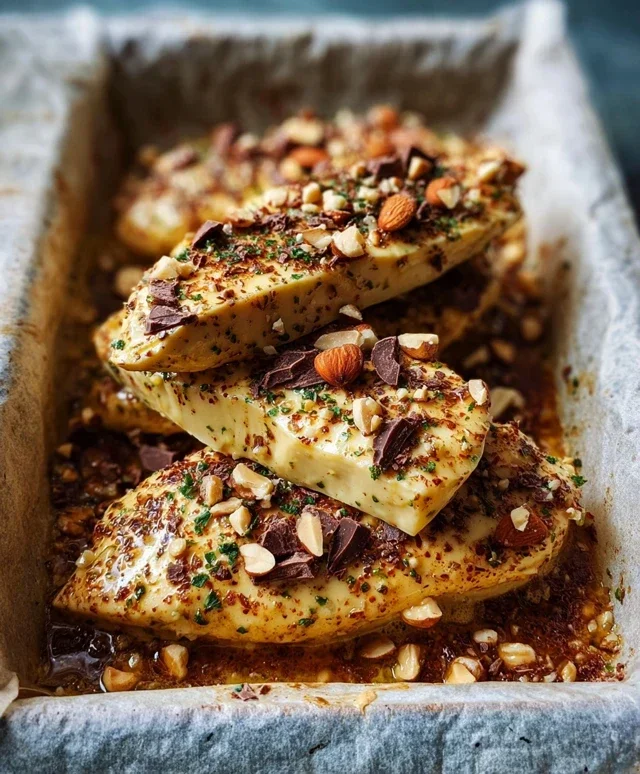
Once rested, your “Loading…” chicken is ready to be served. You can slice it and serve it over rice, alongside your favorite roasted vegetables, or even chopped into salads. Garnish with fresh chopped parsley for a pop of color and freshness, if desired. Enjoy the incredible, deeply satisfying flavor you’ve created! This recipe is so versatile and so delicious, you’ll find yourself making it again and again.

Conclusion:
I hope you’re as excited as I am to try this incredible recipe! It’s a true winner because it’s so versatile, surprisingly simple to prepare, and absolutely bursting with flavor. Whether you’re a seasoned home cook or just starting out, this dish is designed to impress and delight. The combination of textures and tastes makes it a standout for any occasion.
For serving, I love to pair this with a fresh green salad to balance the richness, or some fluffy rice or crusty bread to soak up all those delicious juices. It’s also fantastic alongside roasted vegetables or mashed potatoes. Don’t be afraid to get creative with your own favorite accompaniments!
When it comes to variations, the possibilities are endless! You can easily adjust the spice level, swap out proteins, or introduce different herbs and spices. Perhaps try adding some smoked paprika for a deeper, smoky note, or a pinch of chili flakes for an extra kick. Whatever you choose, this recipe serves as a fantastic foundation for your culinary adventures.
I truly encourage you to give this a go. It’s a rewarding experience that will undoubtedly become a regular in your recipe repertoire. I can’t wait to hear about your own successful attempts and any delicious twists you discover!
Frequently Asked Questions:
Can I make this recipe ahead of time?
Yes, absolutely! This recipe holds up beautifully and can be made a day in advance. In fact, the flavors often meld and deepen overnight, making it even more delicious. Simply store it in an airtight container in the refrigerator and reheat gently on the stovetop or in the oven.
What if I don’t have [ingredient name]?
Most ingredients in this recipe can be substituted. For example, if you’re out of [common substitute ingredient], you can often use [alternative ingredient] with similar results. Feel free to experiment! The beauty of this recipe lies in its adaptability.
Chicken Loading…
A versatile chicken preparation designed for optimal flavor and texture. Follow these simple steps for perfectly cooked, juicy chicken.
Ingredients
-
1 whole chicken, about 3-4 pounds
-
2 tablespoons olive oil
-
1 tablespoon salt
-
1 teaspoon black pepper
-
1 teaspoon garlic powder
-
1 teaspoon paprika
-
1/2 teaspoon onion powder
Instructions
-
Step 1
Preheat your oven to 400°F (200°C). -
Step 2
Start by patting the chicken dry; this helps the seasoning stick better. -
Step 3
In a small bowl, mix together olive oil, salt, black pepper, garlic powder, paprika, and onion powder. -
Step 4
Rub the seasoning mixture all over the chicken, both inside and out. -
Step 5
Place the chicken in a roasting pan. -
Step 6
Roast for 1 hour to 1 hour 30 minutes, or until the juices run clear. -
Step 7
Use a meat thermometer to check that your chicken reaches 165°F (74°C). This ensures it’s safe to eat, yet still tender. -
Step 8
Let the chicken rest for about 5 minutes after cooking. This lets the juices redistribute, making each bite more succulent.
Important Information
Nutrition Facts (Per Serving)
It is important to consider this information as approximate and not to use it as definitive health advice.
Allergy Information
Please check ingredients for potential allergens and consult a health professional if in doubt.