Easy Pickled Red Onions – Quick & Tangy Recipe
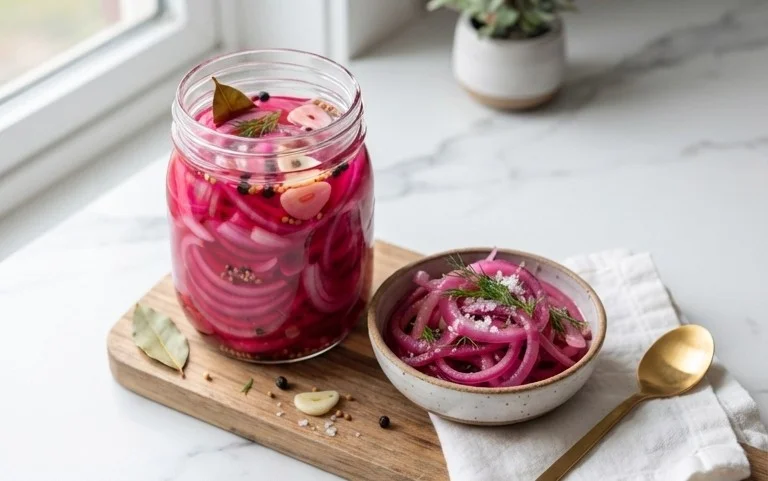
Pickled red onions are the secret weapon in my culinary arsenal, a vibrant ruby jewel that elevates everything it touches. I’ve always been drawn to their stunning color, a visual promise of the bright, tangy flavor explosion they deliver. It’s no wonder these quick pickles have become a beloved staple for so many of us! They possess that magical ability to cut through richness, add a delightful crunch, and introduce a welcome zing to an otherwise ordinary meal. What makes these pickled red onions truly special is their incredible versatility. Think of them as a flavor enhancer, a little jar of culinary sunshine perfect for topping tacos, brightening up sandwiches, swirling into salads, or even gracing a charcuterie board. They transform the mundane into the memorable, and I’m so excited to share my easy method for making these fantastic pickled red onions at home with you today.
Pickled Red Onions
There’s a reason pickled red onions are appearing on everything from tacos and salads to burgers and sandwiches. They offer a delightful burst of tangy, slightly sweet, and wonderfully sharp flavor that can elevate even the simplest of dishes. The vibrant pink hue is also a visual treat, adding a pop of color to any plate. And the best part? Making them at home is incredibly easy and requires minimal effort. You can whip up a batch in just a few minutes, and then let time do its magic. These are perfect for keeping in the fridge to add a quick flavor boost to your meals throughout the week. I love having a jar of these on hand – they are a true game-changer for weeknight dinners!
Ingredients:
Preparation of the Onion
First things first, let’s get our star ingredient ready. You’ll want to start with a large red onion. For the best results and even pickling, I find it’s easiest to slice the onion thinly. You can use a mandoline slicer for perfectly uniform slices, which helps them pickle evenly and look incredibly appealing. If you don’t have a mandoline, a sharp knife will do the job just fine. Aim for slices that are about 1/8 inch thick. As you slice, try to maintain consistency. Once sliced, you’ll want to separate the rings. You can gently pull them apart with your fingers. If you notice any tough inner core pieces, you can discard those. The thinner you slice and the more you can separate the rings, the better they will absorb the pickling brine.
Creating the Brine
Now, let’s make the magic happen with our pickling brine. In a small saucepan, combine 1 cup of white vinegar and 1 cup of water. White vinegar is preferred for its clean, sharp acidity, which is essential for a good pickle. The water helps to mellow the vinegar slightly, creating a balanced flavor. To this liquid mixture, add 1 tablespoon of sugar. I like to add a touch of sweetness to balance the tartness of the vinegar, but as noted in the ingredients, you can absolutely omit the sugar or swap it for a sugar substitute if you’re watching your sugar intake or prefer a more purely savory pickle. Finally, add 2 teaspoons of kosher salt. Kosher salt is ideal because its larger flakes dissolve well and it doesn’t contain any anti-caking agents that might make your brine cloudy. Gently stir these ingredients together over medium heat. You don’t need to bring it to a rolling boil; just heat it enough so that the sugar and salt are completely dissolved. Once dissolved, remove the saucepan from the heat.
Combining Onion and Brine
This is where the transformation begin extracts! Take a clean glass jar or container. I prefer glass jars with tight-fitting lids, as they are non-reactive and easy to see the beautiful color change. Place your sliced and separated red onion rings into the jar. Try to pack them in there, but don’t force them to the point where they break apart too much. Once the onions are in the jar, carefully pour the warm brine over them. Ensure that all the onion slices are submerged in the liquid. If you find that your onions are peeking out from the brine, you can gently press them down with a spoon or add a tiny bit more water and vinegar in equal parts to cover them. The warmth of the brine will help the onions start to soften and absorb the flavors immediately.
The Waiting Game: Flavor Development
Now comes the most important part: waiting! Once the jar is filled and senon-alcoholic aled tightly, let it sit at room temperature for at least 30 minutes. You’ll notice a remarkable change even in this short time. The onions will start to soften slightly, and the vibrant white and purple hues will begin extract to deepen and transform into that iconic beautiful pink. The longer they sit, the more intense the pickling will become. For a truly delicious pickle, I usually let them sit for at least an hour at room temperature before refrigerating. This initial period at room temperature helps the pickling process get a good head start. After this initial period, transfer the jar to the refrigerator. The pickling process will continue in the cold, developing even more flavor and a delightful crisp-tender texture.
Storage and Enjoyment
Your pickled red onions are best stored in the refrigerator. They will continue to improve in flavor over time. Ideally, let them chill for at least a few hours in the fridge before diggin extractg in. This allows the flavors to meld and the onions to firm up slightly. They are typically at their best after a day or two, but you can certainly enjoy them after the initial 30-minute room temperature rest if you’re impatient! These pickled red onions will last in the refrigerator for several weeks, usually up to 2-3 weeks, though I rarely have them last that long! The brine itself becomes wonderfully flavorful and can even be used as a base for salad dressings or marinades. When you’re ready to enjoy them, simply drain them slightly or use them directly from the jar. Add them to tacos, avocado toast, grain bowls, salads, grilled meats, or anywhere you want a zesty, flavorful punch. They truly are a versatile and addictive condiment!
Conclusion:
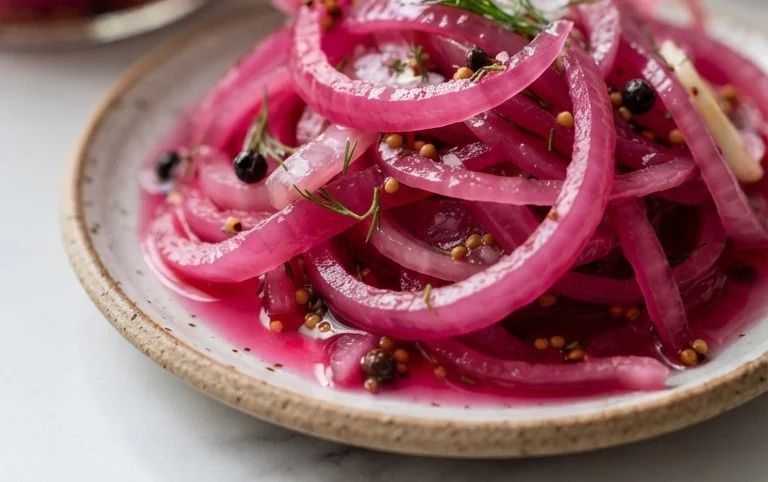
There you have it! Mastering the art of pickled red onions is incredibly simple, and the results are truly remarkable. This vibrant, tangy condiment is a game-changer for elevating everyday dishes. Its stunning pink hue and satisfying crunch add both visual appeal and a burst of flavor that complements a vast array of foods. From brightening up tacos and sandwiches to adding a sophisticated touch to salads and charcuterie boards, pickled red onions are incredibly versatile. I encourage you to give this recipe a try; it’s a fantastic way to add a homemade touch to your meals and impress your friends and family. Don’t be afraid to experiment with different herbs or spices to create your own signature pickled red onions!
Frequently Asked Questions:
Q: How long do pickled red onions last?
A: When stored properly in an airtight container in the refrigerator, your pickled red onions should stay delicious for at least 2 to 3 weeks. The longer they sit, the more intense the pickle flavor will become.
Q: Can I use different types of vinegar?
A: Absolutely! While apple cider vinegar and white vinegar are popular choices, you can experiment with others like red grape juice vinegar for a deeper flavor profile or rice vinegar for a milder tang. Each will impart a slightly different nuance to your pickled red onions.
Q: What if I don’t have red onions?
A: While red onions are ideal for their vibrant color and slightly sweeter flavor when pickled, you can technically pickle other onions like white or yellow onions. However, they won’t achieve the same beautiful pink hue, and their flavor profile will be different.
Quick Pickled Red Onions
A simple and vibrant recipe for quick-pickled red onions, perfect for adding a tangy crunch to tacos, salads, sandwiches, and more. Easily customizable for your dietary preferences.
Ingredients
-
1 large Red onion, thinly sliced
-
1 cup White Vinegar
-
1 cup Water
-
1 tablespoon Sugar
-
2 teaspoons Kosher salt
Instructions
-
Step 1
Thinly slice the red onion into rings or half-moons. -
Step 2
In a medium saucepan, combine the white vinegar, water, sugar, and kosher salt. -
Step 3
Heat the mixture over medium heat, stirring until the sugar and salt are dissolved. Do not boil. -
Step 4
Place the sliced red onions into a heatproof jar or bowl. -
Step 5
Pour the hot brine over the onions, ensuring they are fully submerged. The onions will start to turn pink immediately. -
Step 6
Let the mixture cool to room temperature, then cover and refrigerate for at least 30 minutes before serving. The longer they sit, the more the flavor develops.
Important Information
Nutrition Facts (Per Serving)
It is important to consider this information as approximate and not to use it as definitive health advice.
Allergy Information
Please check ingredients for potential allergens and consult a health professional if in doubt.