Chocolate Dipped Fruit Cones-Decadent Treat Recipe
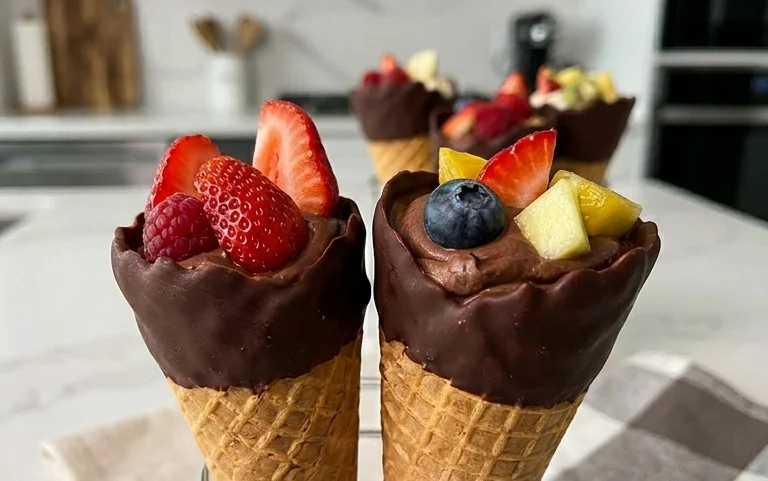
Chocolate Dipped Fruit Filled Cones are more than just a dessert; they’re a delightful explosion of flavor and texture, a perfect harmony of sweet and tart that instantly transports you to pure bliss. Imagin extracte the satisfying crunch of a perfectly baked cone, giving way to a creamy, luscious filling bursting with fresh, vibrant fruit, all enveloped in a rich, decadent cloak of melted chocolate. It’s this irresistible combination that makes chocolate dipped fruit filled cones such a universally beloved treat. They’re playful, elegant, and surprisingly easy to create, making them ideal for impressing guests at a party or simply indulgin extractg in a moment of personal joy. What truly sets these chocolate dipped fruit filled cones apart is their customizable nature – the possibilities for fruit and filling combinations are endless, ensuring a unique and satisfying experience every time.
Ingredients:
Crafting Your Delightful Chocolate Dipped Fruit Filled Cones
Imagin extracte a treat that combines the crisp, sweet crunch of a sugar cone with the luscious burst of fresh fruit, all enrobed in decadent chocolate. That’s precisely what we’re creating today with these Chocolate Dipped Fruit Filled Cones! They are surprisingly simple to make and perfect for a special occasion, a fun afternoon activity with kids, or simply a way to indulge your sweet tooth. The beauty of this recipe lies in its versatility; you can swap out the fruits based on what’s in season or what your favorites are. Get ready to elevate your dessert game!
Preparing the Fruit
Before we dive into the chocolate, let’s get our fruit ready. This is a crucial step to ensure your cones are perfectly filled and the fruit holds its shape. For the strawberries, make sure they are thoroughly washed and dried. Removing the hull is essential, and then slicing them into manageable pieces, not too thin and not too thick, will make them easier to incorporate into the cones and prevent them from becoming mushy. Raspberries and blueberries generally just need a gentle rinse and pat dry. Be extra careful with raspberries, as they are quite delicate. The goal here is to have fresh, vibrant fruit that will offer a delightful contrast to the sweet chocolate and crunchy cone.
Melting the Chocolate
The key to a smooth, glossy chocolate coating is proper melting. You have a couple of options here. The most straightforward method is using a microwave. Place your semi-sweet chocolate chips and the tablespoon of coconut oil (or shortening) into a microwave-safe bowl. Coconut oil is fantastic because it helps the chocolate melt evenly and gives it a lovely sheen. Microwave on 50% power in 30-second intervals, stirring thoroughly after each interval. It’s vital to stir well, as the residual heat will continue to melt the chocolate. Be patient; you don’t want to overheat or scorch your chocolate, which can make it seize up and become unusable. Alternatively, you can use a double boiler. Fill the bottom pot of your double boiler with about an inch of water and bring it to a gentle simmer. Place the chocolate chips and coconut oil in the top bowl, ensuring the bottom of the bowl doesn’t touch the water. Stir continuously until smooth and melted. Whichever method you choose, the result should be a luxuriously smooth, pourable chocolate.
The Art of Dipping and Filling
Now for the fun part – assembling these beauties!
1. Begin extract by carefully dipping each sugar cone into the melted chocolate, tilting the bowl to coat the inside and outside of the cone about two-thirds of the way up. You can use a spoon to help spread the chocolate evenly if needed. Allow any excess chocolate to drip back into the bowl. This initial dip provides a sturdy base and a delicious chocolate shell. You might find it easier to hold the cone by the very tip and dip the open end first.
2. Once dipped, gently place the coated cones upright on a piece of parchment paper or a silicone baking mat. This will prevent them from sticking and allow the chocolate to set slightly. Don’t worry if some chocolate drips down the sides; it adds to the rustic charm!
3. Now, let’s get the fruit in there. Using a small spoon, carefully fill the chocolate-coated part of each cone with a mixture of your prepared strawberries, raspberries, and blueberries. Don’t overfill them, as you want the fruit to stay contained within the chocolate shell and the cone itself. Aim for a delightful layering of colors and flavors. Gently press down on the fruit to ensure it’s nestled in place.
4. Once the cones are filled with fruit, it’s time for a final chocolate coating to seal everything in. Carefully spoon more melted chocolate over the top of the fruit and the open end of the cone, ensuring it covers the fruit and creates a beautiful chocolate “lid.” Again, let any excess chocolate drip off, and then place the cones back onto your parchment-lined surface.
5. For an extra touch of flair, you can melt the optional white chocolate chips (using the same method as the semi-sweet chocolate) and drizzle them artfully over the set chocolate coating. You can also sprinkle some colorful sprinkles over the wet chocolate for added visual appeal and a playful crunch. This is where you can really get creative and personalize your cones!
Setting and Serving
Allow the chocolate to set completely at room temperature, which might take an hour or two, or you can speed up the process by placing them in the refrigerator for about 20-30 minutes. Be mindful that refrigeration can sometimes cause condensation on chocolate, so room temperature setting is often preferred for the best finish. Once the chocolate is firm and solid, your Chocolate Dipped Fruit Filled Cones are ready to be enjoyed! They are best served fresh, so try to make them on the day you plan to devour them. The combination of textures and flavors is truly magical, and I’m sure you’ll love them as much as I do!

Conclusion:
And there you have it – a delightful and surprisingly simple way to elevate your dessert game with these Chocolate Dipped Fruit Filled Cones! This recipe is truly a winner because it combines the satisfying crunch of a cone with the luscious sweetness of chocolate and the bright, refreshing burst of fresh fruit. It’s the perfect blend of textures and flavors, making it an irresistible treat for any occasion.
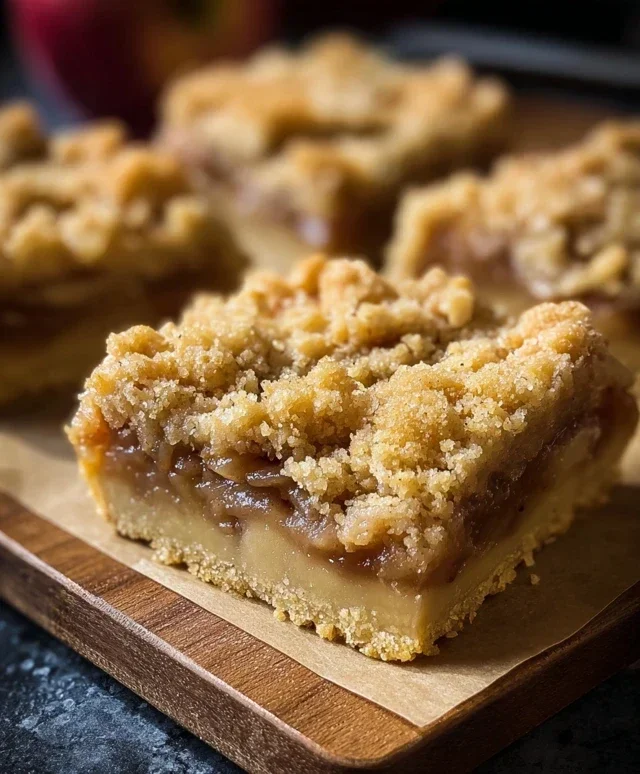
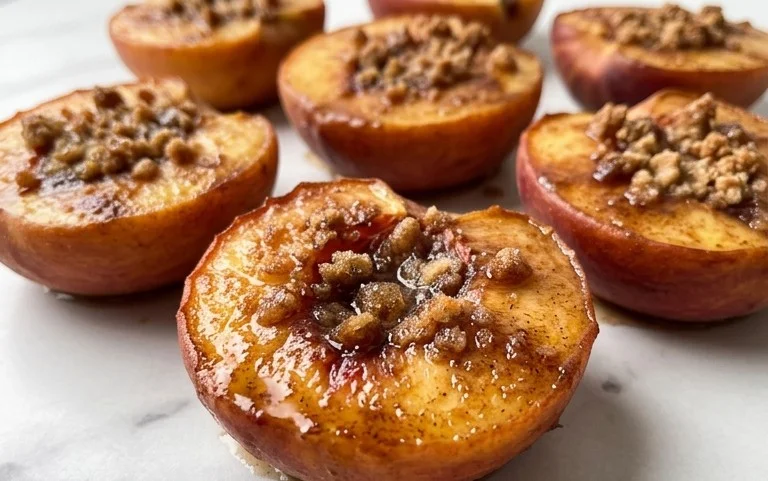
These cones are incredibly versatile. Imagin extracte serving them at a summer picnic, a birthday party, or even just as a special weekend indulgence. They also make for a stunning presentation. For serving suggestions, consider arrangin extractg them artfully on a platter with a dusting of powdered sugar or a drizzle of contrasting chocolate. For variations, don’t be afraid to experiment! Try different types of chocolate, like white or milk chocolate, or even add a sprinkle of edible glitter or chopped nuts to the wet chocolate before it sets. You could also swap out the fruit for berries, diced peaches, or even a dollop of whipped cream. The possibilities are endless!
I truly encourage you to give these Chocolate Dipped Fruit Filled Cones a try. They are sure to impress your friends and family and bring a smile to everyone’s face. Happy baking (and dipping)!
Frequently Asked Questions:
Can I make these cones ahead of time?
Yes, you can definitely make these cones ahead of time! Once the chocolate has fully set, store them in an airtight container in a cool, dry place. It’s best to assemble the fruit filling closer to serving time to prevent the cones from becoming soggy, but the dipped cones themselves will keep well for a day or two.
What’s the best way to melt the chocolate for dipping?
The most common and effective methods are using a double boiler or the microwave. For a double boiler, gently melt the chocolate over simmering water, stirring until smooth. In the microwave, heat in 30-second intervals, stirring well after each, until fully melted and smooth. Be careful not to overheat, as chocolate can burn easily.
My chocolate isn’t coating the cones smoothly. What am I doing wrong?
This can happen if the chocolate is too thick or not melted evenly. Ensure your chocolate is fully melted and has a smooth, fluid consistency. You can add a tiny bit of vegetable oil (about half a teaspoon per cup of chocolate) to help thin it out if needed. Also, make sure the cones are completely dry before dipping.
Chocolate Dipped Fruit Filled Cones
Delightful chocolate-dipped cones filled with fresh fruit, offering a sweet and refreshing treat.
Ingredients
-
12 sugar cones
-
1 cup chopped strawberries
-
1 cup chopped blueberries
-
1 cup chopped raspberries
-
1 cup chopped pineapple
-
1 cup white chocolate chips
-
1/2 cup milk chocolate chips
Instructions
-
Step 1
Prepare your fruit by washing and chopping it into bite-sized pieces. -
Step 2
Melt the white chocolate chips in a microwave-safe bowl in 30-second intervals, stirring between each, until smooth. -
Step 3
Dip the top half of each sugar cone into the melted white chocolate, allowing excess to drip off. -
Step 4
Place the dipped cones on a baking sheet lined with parchment paper and let the chocolate set slightly. -
Step 5
Fill each cone with a mixture of the chopped strawberries, blueberries, raspberries, and pineapple. -
Step 6
Melt the milk chocolate chips similarly to the white chocolate. -
Step 7
Drizzle the melted milk chocolate over the fruit-filled cones for decoration. -
Step 8
Allow the chocolate to harden completely before serving.
Important Information
Nutrition Facts (Per Serving)
It is important to consider this information as approximate and not to use it as definitive health advice.
Allergy Information
Please check ingredients for potential allergens and consult a health professional if in doubt.