Easy Homemade Bread Recipe – Delicious & Simple
Homemade bread is more than just food; it’s a comforting ritual, a sensory delight, and a tangible expression of love. There’s an almost primal satisfaction in transforming simple ingredients – flour, water, yeast, and salt – into a warm, fragrant loaf. Why do we crave homemade bread so much? Perhaps it’s the non-intoxicating aroma that fills our kitchens, a scent that instantly evokes feelings of home and hearth. Maybe it’s the unparalleled texture, the soft, airy crum extractb giving way to a perfectly crisp crust that no store-bought version can ever truly replicate. For me, it’s the magic of watching dough rise, the patient process that rewards with something truly extraordinary. This isn’t just about sustenance; it’s about creating a masterpiece with your own two hands, a delicious testament to simple goodness.
Why You’ll Love This Recipe:
Experience the pure joy of crafting your own delicious loaf.
Discover the secrets to a perfect crust and tender crum extractb.
Impress yourself and your loved ones with this achievable, rewarding bake.
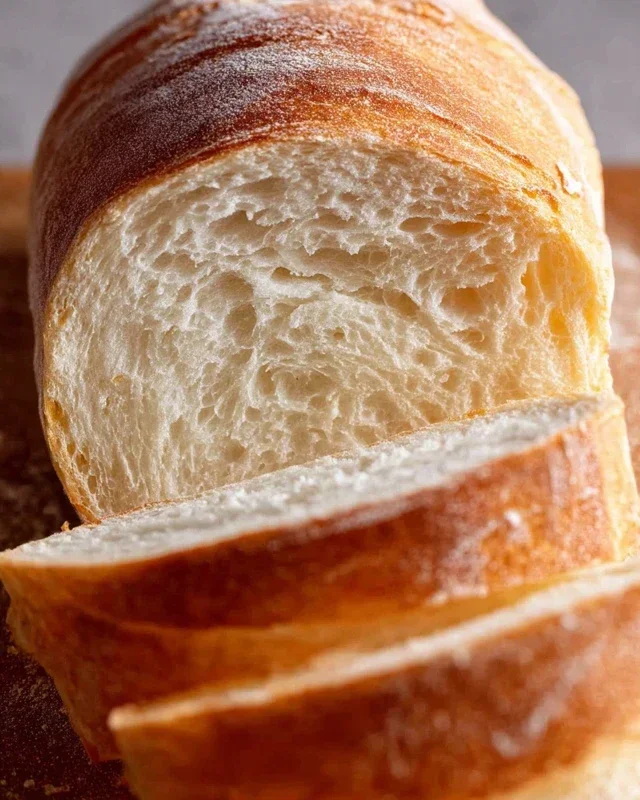
Homemade Bread
There’s a primal satisfaction that comes with baking your own bread. The aroma that fills your home as it bakes, the warmth radiating from a freshly baked loaf, and that first glorious bite – it’s an experience that’s hard to replicate. While store-bought bread is convenient, nothing truly compares to the flavor and texture of homemade. This recipe is a fantastic starting point for anyone looking to embark on their bread-making journey. It’s straightforward, forgiving, and results in a beautiful, crusty loaf with a soft, airy interior. So, let’s get our hands dusted with flour and create some magic!
Ingredients:
Getting Started: Activating the Yeast
The first crucial step in any yeasted bread recipe is to ensure your yeast is alive and kicking. This process, known as “proofing,” guarantees that your dough will rise beautifully. In a large mixing bowl, combine the warm water and your chosen sweetener – either honey or sugar. The water temperature is important; too hot and it will kill the yeast, too cold and it won’t activate properly. Aim for a temperature that feels comfortably warm to the touch, like a baby’s bath. Sprinkle the active dry yeast over the surface of the water. Avoid stirring it in immediately. Let it sit for about 5-10 minutes. You’ll know your yeast is ready when it becomes foamy and bubbly on top, resembling a thick cream. If you don’t see this foamy cap, your yeast might be old or the water temperature was off, and it’s best to start over with fresh yeast.
Building the Dough
Once your yeast has awakened, it’s time to introduce the other players. Add the salt and oil to the yeast mixture. The salt not only adds flavor but also helps control the yeast’s fermentation. The oil contributes to a softer crum extractb and helps with browning. Now, it’s time to add the flour. Start by adding about 4 cups of the flour to the wet ingredients. If you’re using a stand mixer with a dough hook, begin extract mixing on low speed until the ingredients just start to come together. If you’re mixing by hand, use a sturdy spoon or your hands to incorporate the flour until a shaggy dough forms.
Kneading for Structure
Kneading is the process of developing the gluten in the flour, which gives bread its structure and chewy texture. This is where the real magic happens. If using a stand mixer, increase the speed slightly and knead for about 8-10 minutes. The dough should pull away from the sides of the bowl and become smooth and elastic. It should be slightly tacky but not stick excessively to your fingers. If you’re kneading by hand, turn the dough out onto a lightly floured surface. Push the dough away from you with the heels of your hands, then fold it back over on itself. Rotate the dough a quarter turn and repeat. Continue this process for about 10-15 minutes, or until the dough is smooth and elastic. You’ll know you’ve kneaded enough when you can gently stretch a small piece of dough thinly without it tearing – this is called the “windowpane test.” Add more flour, a tablespoon at a time, only if the dough is excessively sticky and unmanageable.
The First Rise: A Patient Wait
Now that your dough is beautifully kneaded, it’s time to let it rest and rise. Lightly grease a clean bowl with a little oil. Place the dough in the greased bowl, turning it once to coat the entire surface. Cover the bowl tightly with plastic wrap or a damp kitchen towel. Place the bowl in a warm, draft-free spot. This could be a slightly warmed oven (turned off!), on top of your refrigerator, or simply on your counter on a warmer day. Let the dough rise for about 1 to 1.5 hours, or until it has doubled in size. This “first rise” allows the yeast to ferment, producing gases that create the airy texture of the bread. Patience is key here; don’t rush this step.
Shaping and Second Rise
Once your dough has doubled in size, gently punch it down to release the air. Turn the dough out onto a lightly floured surface. At this point, you can shape your loaf. For a classic round loaf, gently form the dough into a ball, tucking the edges underneath. For a sandwich loaf, shape it into an oblong and place it in a greased loaf pan. Once shaped, cover the loaf loosely with plastic wrap or a clean kitchen towel and let it rise again for another 30-45 minutes, or until it has visibly puffed up and looks airy. This second rise, or proofing, will contribute to the final light and fluffy texture of your bread.
Baking to Golden Perfection
Preheat your oven to 375 degrees Fahrenheit (190 degrees Celsius). Once the dough has completed its second rise, carefully place the loaf (or loaves) into the preheated oven. If you like a crispier crust, you can create steam in your oven by placing a pan of hot water on the rack below the bread. Bake for 30-40 minutes for a free-form loaf, or 35-45 minutes for a loaf in a pan. The bread is done when it’s a deep golden brown and sounds hollow when tapped on the bottom.
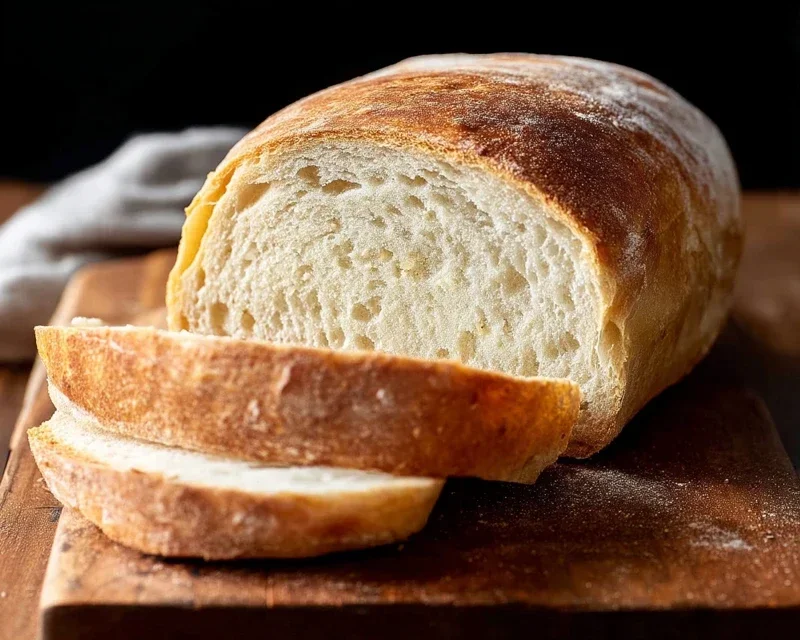
Cooling and Enjoying
The hardest part of baking bread is waiting for it to cool! Once removed from the oven, immediately transfer the bread to a wire rack. This allows air to circulate around the loaf, preventing a soggy bottom crust. Let the bread cool completely for at least an hour before slicing. Slicing hot bread can cause the inside to become gummy. Once cooled, slice into thick pieces and enjoy the fruits of your labor. Whether you slather it with butter, dip it in soup, or use it for sandwiches, your homemade bread is sure to be a hit!
Conclusion:
You’ve done it! You’ve embarked on the incredibly rewarding journey of making your own homemade bread. This recipe isn’t just about flour, water, yeast, and salt; it’s about the aroma filling your kitchen, the satisfaction of kneading dough with your own hands, and the pride of pulling a golden, crusty loaf from your oven. It’s a simple, yet profound, culinary achievement that tastes infinitely better than anything store-bought. Imagin extracte the delight of slicing into a warm, soft interior, perfect for slathering with butter or dipping into your favorite soup. This versatile loaf is a fantastic base for all sorts of creations. Enjoy it simply toasted with jam, as the foundation for hearty sandwiches, or alongside a flavorful stew. Don’t be afraid to experiment with variations – add herbs like rosemary or thyme to the dough, swirl in some cheese, or try incorporating whole wheat flour for a nuttier taste. The possibilities are truly endless, and I wholeheartedly encourage you to give this homemade bread recipe a try. It’s a delicious adventure waiting to happen!
Frequently Asked Questions:
Why is my homemade bread dense?
A dense loaf often indicates that the yeast wasn’t active enough, or the dough wasn’t allowed to rise sufficiently. Ensure your yeast is fresh and proof it in warm (not hot) liquid before mixing. Giving the dough ample time to rise in a warm place is also crucial for achieving a light and airy texture.
Can I freeze homemade bread?
Absolutely! Once your bread has completely cooled, wrap it tightly in plastic wrap, then in foil, or place it in a freezer-safe bag. It will stay fresh in the freezer for up to 3 months. Thaw it at room temperature or gently reheat it in the oven.
Homemade Bread
A simple and delicious recipe for homemade bread, perfect for beginners.
Ingredients
-
2 cups warm water (105-115 degrees Fahrenheit)
-
1 Tablespoon active dry yeast
-
1/4 cup honey
-
2 teaspoons salt
-
2 Tablespoons canola oil
-
4 cups all-purpose flour
Instructions
-
Step 1
In a large bowl, combine warm water and honey. Sprinkle yeast over the water and let it sit for 5-10 minutes until foamy. -
Step 2
Stir in salt and oil. -
Step 3
Gradually add flour, about 1 cup at a time, mixing until a shaggy dough forms. You may not need all the flour. -
Step 4
Turn dough out onto a lightly floured surface and knead for 8-10 minutes until smooth and elastic. -
Step 5
Place dough in a lightly oiled bowl, cover, and let rise in a warm place for 1 hour, or until doubled in size. -
Step 6
Punch down dough, shape into a loaf, and place in a greased loaf pan. Cover and let rise for another 30 minutes. -
Step 7
Bake in a preheated oven at 375°F (190°C) for 30-35 minutes, or until golden brown and the internal temperature reaches 200°F (93°C).
Important Information
Nutrition Facts (Per Serving)
It is important to consider this information as approximate and not to use it as definitive health advice.
Allergy Information
Please check ingredients for potential allergens and consult a health professional if in doubt.